Just wanted to pop in with a peek at my planner, and to showcase the fabulous Some Kinda Wonderful collection from Close To My Heart.
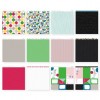
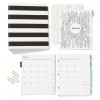
Here's a look at the collection:
And here's a look at my planner for the month of April:
I've been a planner girl for decades. I've tried lots of different layouts, brands, styles, you name it. When all is said and done, I usually opt for making my own. The last couple of years, I've used notebooks to make my planners. (You can see those here and here.) This year, however, I decided to redesign my weekly pages so I could print them out (rather than drawing them in my notebooks), and went with my tried and true Circa disc bound system. (A tool that I've also used for many moons, as you can see from this rather scratched cover).
But let's look at the fun stuff!
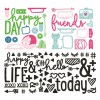
I love the bright colors and funky fonts of Close To My Heart's Some Kinda Wonderful collection. I decided to make a bold intro page for my planner using patterned paper from the collection and one of the 4x6 cut-aparts that's included in the paper pack. The "hello" and "LIFE" die cuts are black glitter chipboard pieces from the coordinating complements pack. I used the zip strips from the top of the paper for added texture and pattern.
The main reason I add an intro page is so I can put contact information on the back. I'm always hopeful that should I leave this somewhere, some kind soul will ship it back to me. (Hopeful...not confident.) I used a 3x4 cut-apart for the address spot and added a few sticker complements for interest.
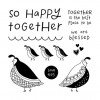
The backside of the dividers have inspirational quotes on them. However, since I cut the page down, the quote is very much off center. So I covered that with another 4x6 cut-apart and added a speech bubble sticker from the complements. The quote and hearts are from CTMH's April Stamp Of The Month: Flock Together, which will either leave you singing So Happy Together by The Turtles or Together (Having a Ball) by the Partridge Family.... Just sayin'....
I then used some of the papers to back my monthly spread. I added some Lemon cardstock to reinforce the disc area on the calendar pages.
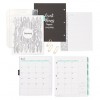
And here's the monthly spread:
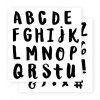
For the upcoming months, I'll be using preprinted spreads to cut down on the stamping. I love the brush stroke look of this Marker Alphabet stamp set, but I needed a monthly calendar that didn't require me to stamp everything in.
And there you have it! A quick peek at my planner all decked out in Some Kinda Wonderful! I actually change it up every month, but it will certainly be hard to say goodbye to this fabulous collection.
Hope you have a wonderfully creative rest of the week, and stay tuned for the Rose Blossom Blog Hop on Saturday!



Yay, so glad you are back, Kim! And how fun to see your adorable planner! Love that you make your own, and I just adore all your fun details. Great idea to incorporate a coloring page on your dividers. And I love the old binda disc binding on here. I used to make little booklets for my kiddos with that system, so this makes me a bit nostalgic! :)
ReplyDelete