The Marketplace @ Violets & Sunshine

Showing posts with label #ctmhsomekindawonderful. Show all posts

15 April 2017

O Happy Day! It's Some Kinda Wonderful!


Hi All! Welcome to the Rose Blossom Blog Hop for the month of April! If you just hopped over from from the AMAZING Shelly Nemitz's blog, Just One Pretty Piece, you're in the right place.

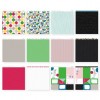
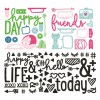
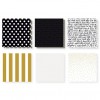
This month we're featuring the fun and funky Some Kinda Wonderful collection by Close To My Heart.


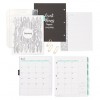
I have to be honest, I wasn't certain I would like this collection. Oh how wrong I was! The bright, rich colors are fabulous to create with, and the funky fonts and fun icons can't help but make you smile. I've had a ball using it for cards, scrapbooking, gift packaging, planning, and for today's project: a simple, college-ruled composition book turned Fabulous Journal!

Let's take a look:


I started by covering the front and back of this journal with papers from the Some Kinda Wonderful collection. I added black glitter letters for the title, and then jazzed it up a bit more with stickers and other glitter accents (all from the Some Kinda Wonderful Compliments pack). I kept the layers fairly flat because this will be traveling with me.

Here's a collage of the close ups of the front:

And here's the back, which I kept very plain:


Now let's take a look at the inside covers.


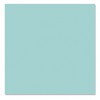
I covered the inside front cover with Glacier cardstock and added a stash pocket. I matted the pocket and cover with patterned paper. I like to add my name and contact info in my journals in case I happen to said journal, so I created a little name plate from a 3 x 4 journaling card on the cut apart page included in the paper pack. I added a stickers from the compliments pack for a little extra somethin', and then turned to the back cover.


Here, I added a pocket that I made from a sheet of patterned paper and blinged it up with more stickers and black glitter compliments. 

And that's it! A fabulous journal just waiting to be filled!

Hope you enjoyed this project! Now for more inspiration hop on over to the FANTASTIC Mary Newman's blog, The Pixie Dust Playground. If you get lost along the way, here's a list of hop participants:

Kim {that's me!}

See you soon and have a wonderfully creative weekend!


13 April 2017

Some Kinda Wonderful Planning

Hi All! It's really been way too long since my last post, but oh so good to be back!

Just wanted to pop in with a peek at my planner, and to showcase the fabulous Some Kinda Wonderful collection from Close To My Heart.

Here's a look at the collection:


And here's a look at my planner for the month of April:


I've been a planner girl for decades. I've tried lots of different layouts, brands, styles, you name it. When all is said and done, I usually opt for making my own. The last couple of years, I've used notebooks to make my planners. (You can see those here and here.) This year, however, I decided to redesign my weekly pages so I could print them out (rather than drawing them in my notebooks), and went with my tried and true Circa disc bound system. (A tool that I've also used for many moons, as you can see from this rather scratched cover).

But let's look at the fun stuff!


I love the bright colors and funky fonts of Close To My Heart's Some Kinda Wonderful collection. I decided to make a bold intro page for my planner using patterned paper from the collection and one of the 4x6 cut-aparts that's included in the paper pack. The "hello" and "LIFE" die cuts are black glitter chipboard pieces from the coordinating complements pack. I used the zip strips from the top of the paper for added texture and pattern.


The main reason I add an intro page is so I can put contact information on the back. I'm always hopeful that should I leave this somewhere, some kind soul will ship it back to me. (Hopeful...not confident.) I used a 3x4 cut-apart for the address spot and added a few sticker complements for interest.


I cut down the monthly dividers for CTMH's Everyday Life Albums so that they would fit my planner (which is smaller than A5). I thoroughly enjoy coloring, so these dividers have been a great addition to my planner! (If you follow me on Instagram, you can see March in full color. Somehow I missed posting January and February....)


The backside of the dividers have inspirational quotes on them. However, since I cut the page down, the quote is very much off center. So I covered that with another 4x6 cut-apart and added a speech bubble sticker from the complements. The quote and hearts are from CTMH's April Stamp Of The Month: Flock Together, which will either leave you singing So Happy Together by The Turtles or Together (Having a Ball) by the Partridge Family.... Just sayin'....


I then used some of the papers to back my monthly spread. I added some Lemon cardstock to reinforce the disc area on the calendar pages.

And here's the monthly spread:


For the upcoming months, I'll be using preprinted spreads to cut down on the stamping. I love the brush stroke look of this Marker Alphabet stamp set, but I needed a monthly calendar that didn't require me to stamp everything in.

And there you have it! A quick peek at my planner all decked out in Some Kinda Wonderful! I actually change it up every month, but it will certainly be hard to say goodbye to this fabulous collection.

Hope you have a wonderfully creative rest of the week, and stay tuned for the Rose Blossom Blog Hop on Saturday!


31 January 2017

Tuesday Treats: That's Some Kinda Wonderful!

Hi All! Welcome to another Tuesday Treats. Today's box was inspired by a little Godiva candy box I received at Christmas. This cute little box requires no adhesive, which means you could make a number of them and store them flat for future use. Let's take a look:


To create this box, I first made a template by tracing the shape of the original box onto some 110 lb  Neenah Solar White Cardstock.


I drew in score lines, making sure to get the correct angles, and then cut out the flaps and notches.


I made the box itself from the fabulous Swan Lake Paper by Close To My Heart. For the embellishment, I used stamps from Close To My Heart's Some Kinda Wonderful (Cardmaking) stamp set. I stamped the bird image in Memento Tuxedo Black ink on both the patterned paper and White Daisy Cardstock. I also stamped the speech bubble from the set on White Daisy in the same black ink. I colored the bird on the white cardstock with Copic Markers (Y02, Y06, Y15 and YR4 for the beak) and cut it out by hand, cutting off the feet and little feather. I added it directly to the front of the box, piecing it over the stamped image so that the feet and feather matched up. I added hearts to the speech bubble in Eggplant ink and hand cut the speech bubble from the cardstock. I popped the speech bubble up with foam tape. (This set has matching dies, which I have, that work beautifully. I didn't want the extra little border that the dies leave on this project, so I hand cut the images.) Finally, I added a few dots and lines with my Copic Multiliner to "ground" the bird on the box.

I decided to make this box into a little bag, so I punch two little holes in the top fold of the bag and added some White & Gold striped ribbon for a handle, securing it with a little adhesive.

Here's a look at the back of the bag. The closure is a series of flaps and notches.


And here's a look at what the bag can hold (in addition to Godiva truffles!):


This is such a cute shape! I foresee some Valentine versions of this box coming soon! Until then, let's take one more look at this sweet little treat:


Have a wonderfully creative day!