The Marketplace @ Violets & Sunshine

Showing posts with label Urban Collection. Show all posts

01 June 2016

Takin' the Long Way Home


Hi All! Welcome to the Rose Blossom Blog Hop. Today we're featuring Close To My Heart's June Stamp Of The Month: Long Way Home. Check out these fantastic travel images:


If you've just hopped over from the oh-so-talented Shelly Nemitz' blog, Just One Pretty Piece, you're in the right place. I'll have a list of participants at the end of the post. Now, on to the project!


With May behind me, I have a few more hours in the craft room these days, so I decided to create a little home decor piece using pictures from our Spring Break adventures. The Long Way Home stamp set was perfect for this project!


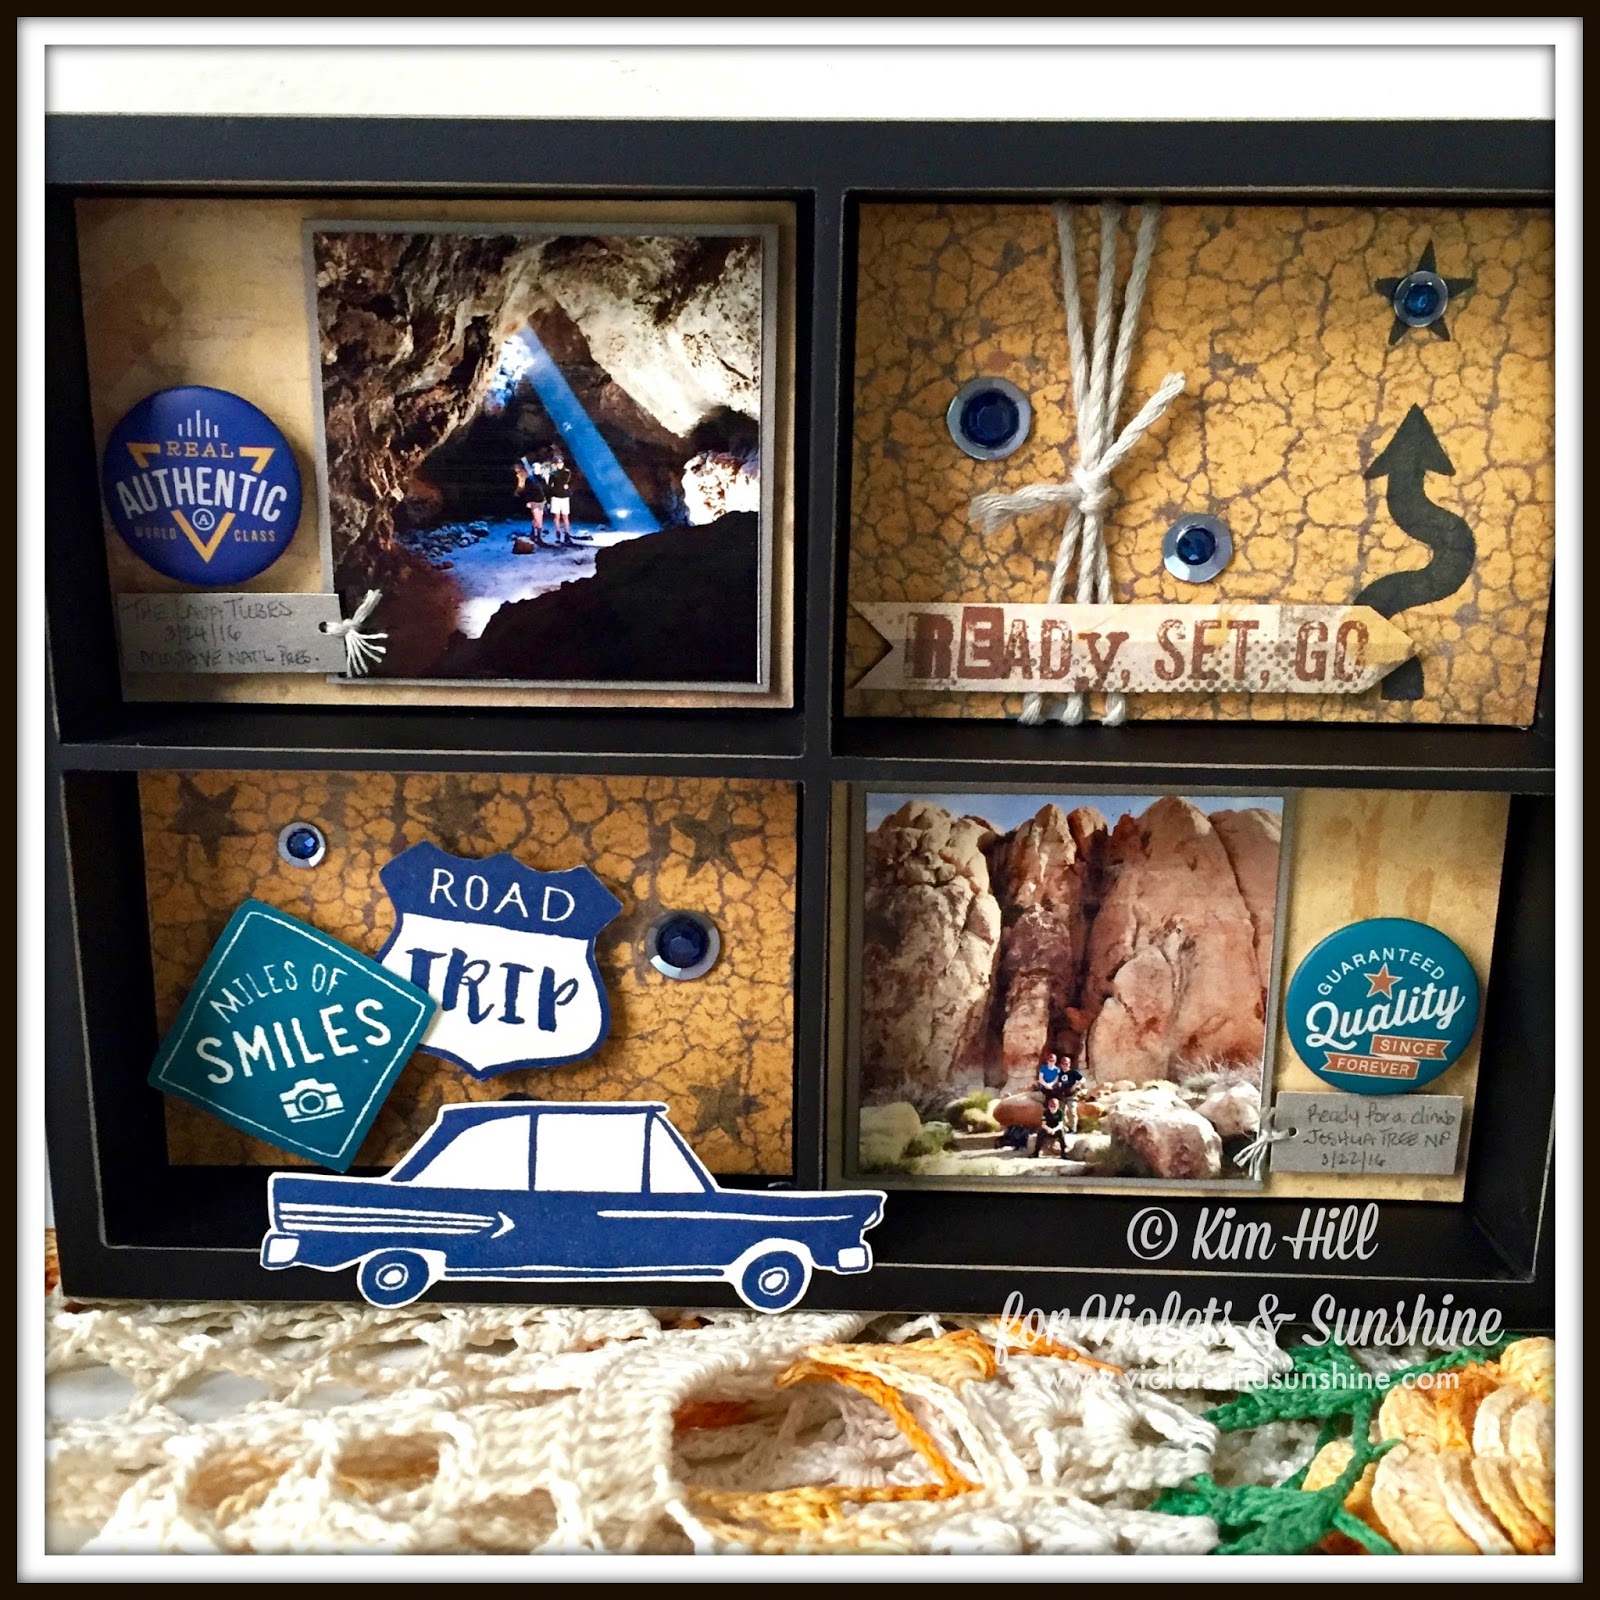
I began by cutting pieces of Urban paper to fit each section of the display. I added some stamping to some of the paper using the stamp of the month and Sapphire, Peacock, and Saffron inks. I then created some embellishments by stamping some of the images in those same colors on Colonial white cardstock and fussy cutting them out.


I added the fussy cut images to the sections using layers of foam tape. I finished everything off by adding some Whisper Thick Twine, Silver Sequins, dark blue sparkles, and buttons from the Urban Assortment. I matted my pictures with Whisper cardstock and added them to their respective patterned paper with foam tape. (I also added little info tags in Whisper cardstock, which are adhered directly to the paper.) I then added each bit of patterned paper to its section using two layers of foam tape for each.

Here is a collage of close-ups:


My favorite section is "How We Roll," which I stamped using the new Noted stamp set. "Eat well, travel often" is a spot on description of how we roll as a family!

So I hope you enjoyed this little home decor piece. As soon as my husband saw it, he claimed it for his desk! Don't forget, the Long Way Home stamp set is only available through the month of June. Now, hop on over and see what the über talented Morgan Vogt has for your inspiration at Tweetscraps!

And, as promised, here's a list of participants:

Kim {that's me!}

Have a wonderfully creative day!


20 November 2015

Friday Focus: The Urban Collection


Hi All! Welcome to another Friday Focus. Today we're featuring Close To My Heart's Urban Collection. This collection is fantastic for guys, but really can be used for anyone. It has that edgy urban grunge feel with a lot of visual textures like corrugated and embossed metals, weathered woodgrains, and paint stained plaster. Very cool!

So for today's project, I decided to share a little handmade kindness with my urban-born teens. As they've been helping themselves to my M&Ms stash of late, I decided to embrace it (for the moment) and make them each a little treat box. Let's take a look:


This project was completely inspired by Sam Donaldson at Pootles Papercraft in the UK. I used her exact dimensions and just changed up the closure (I liked the clothespin with this paper). The box on the left is for my daughter and the one on the right is for my son. As you can see, the Urban papers pair beautifully with Kraft cardstock. To give you a little perspective on the size, the sentiment is stamped on a 3/4-inch circle of Colonial White cardstock. The largest circle is 1 1/4 inches. (This is a small box! But I did fit in the contents of 2 fun-sized M&Ms packs in each...) The sentiment is from the Mini Messages Hostess Rewards stamp set. (This fun set comes with 25 different mini messages with icons and can be yours for $10 when you host a Close To My Heart gathering.)

Here are some close-ups:


For my son's box, I stamped the heart in Sapphire ink and the words in Slate. I inked around the edges of each circle in Sapphire and popped them all up with dimensional adhesive.


For my daughter's box, I stamped the heart in Eggplant ink and the words in Peacock. I then inked around the edges of each layer with Saffron ink to make them stand out a little more. I also added a scalloped circle under the sentiment to make it look a little more like a flower. I popped up each layer with dimensional adhesive.

Finally, I added some twine from my stash to the mini clothespins (also from my stash) with Liquid Glass.

And now one more look:


I hope you enjoyed the mini treat boxes. I know my kids did! Now, for more Urban inspiration, hop on over to From My Bungalow and see what the incredibly talented Lynn Darda has for you.

Have a wonderfully creative day!