The Marketplace @ Violets & Sunshine

Showing posts with label rose blossom blog hop. Show all posts

15 June 2017

No Worries! It's All Good....


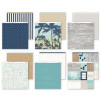
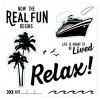
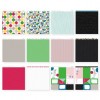
Hi All! Welcome to the Rose Blossom Blog Hop for June featuring Close To My Heart's No Worries collection. And I'm here to tell ya folks, it's ALL good! If you just hopped in from the fabulous Shelly Nemitz' blog, Just One Pretty Piece, you're in the right place. This collection is perfect for documenting the lazy days of summer.  Take a look:


I've been creating like mad with these papers and complements, and it's been a breeze. Everything coordinates beautifully, and the paper designs are perfect for all sorts of non-scrapbooking needs. Like a farewell card, for example:


I needed a couple of these cards this month for friends who are moving home to other parts of the world.

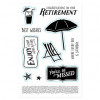
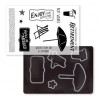
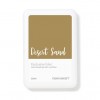
I used kraft cardstock for the card base, and layered it with Sapphire cardstock and No Worries paper. (LOVE those cabana stripes). I stamped the palm trees image from the No Worries Scrapbooking stamp set directly on the middle panel using Sapphire ink, and then stamped the image again on the White Daisy panel inside the card for a lighter, second-generation look. I then used Desert Sand ink to stamp the bottom edge of each panel with the sand texture stamp from the No Worries Cardmaking stamp set. I used the same stamp and some ink-blending techniques to create a beach look on the inner panel as well. I decided to create my own embellishments for the front using stamps and coordinating thin cuts from the No Worries Cardmaking set. I stamped the umbrella in Sapphire ink, the sentiment in Cranberry, and the starfish on the inside in second generation Sapphire, Cranberry, and Lagoon inks. I cut everything out with the coordinating Thin Cuts, but decided to cut the extra white edge off the star fish. For the deck chair, I stamped it twice--once in Desert Sand and once in Lagoon--and cut both out with the Thin Cuts. I then cut the striped fabric from the Lagoon chair and pieced it onto the Desert Sand chair. I then popped every thing up with foam tape.

Here's a look at some close ups:


And here's the card once again:


I hope you liked my little farewell. I know you're going to LOVE this collection, so you definitely want to go check it out here. In the meantime, hop on over for some AMAZING inspiration from Morgan Vogt at Tweetscraps.

Have a wonderfully creative week!


15 May 2017

Live Beautifully


Hi All! Welcome to the Rose Blossom Blog Hop for the month of May featuring the limited edition Live Beautifully Collection by Close To My Heart. If you just hopped over from the incomparable Marg Van Patten's blog, I didn't Have Potatoes, you're in the right place!
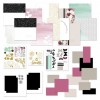
So May is National Scrapbooking Month and to celebrate, Close To My Heart has released the limited edition (available through the end of May) Live Beautifully collection:


This limited edition collection offers something for everyone. If you're a scrapbooker, cardmaker, or just all around paper crafter, check out the gorgeous paper pack (that includes specialty papers with gold foiling) and stamp set. If you like things quick and easy and beautiful, there's the Live Beautifully Cut Above Kit that has all that you need to make 5 lovely layouts including page protectors (you just bring a little adhesive). And if you just need the whole thing from start to finish, there's a bundle that includes a beautiful album, adhesive, the Cut Above Kit, and even an archival safe journaling pen so you can tell your story.

So what am I making with Live Beautifully? I'm so glad you asked!

Let's take a look:


I began by covering this little frame with two of the patterns in the Live Beautifully collection. I added a black and white zip strip from the top of one of the papers to the inner edge of the frame to create a more finished look. I then sealed the paper with Ranger's Distress Collage Crazing Medium, and let it dry. After the frame was dry, I hid the seam between the papers by adding gold shimmer ribbon from the Uptown ribbon pack and layered that with the crochet ribbon from the Rustic Home ribbon pack to give it a more shabby chic feel.

To embellish the frame, I stamped a sentiment from the Live Beautifully stamp set in VersaMark ink and heat embossed it in gold. I then stamped the main sentiment from the Beautiful Moments stamp in VersaMark ink on a scrap of dotted kraft cardstock from the Rustic Home Fundamentals paper pack, and heat embossed it in gold as well. I also heat embossed images from the Keep Dreaming stamp set in gold on vellum, and used my Prismacolor pencils to color the images on the reverse side. (The rose image is actually embossed in gold sparkle embossing powder, while the leaves are in the same gold as the sentiments.) Once I was finished coloring the images, I fussy cut them and added them to the front of my frame, along with a nest of gold thread and jute twine (which is really just strands I cut from the jute ribbon in the Rustic Home ribbon pack. After arranging the flower, I thought the frame still needed a little something. So I dug into my stash and found some paper butterflies and a few black sparkles. I added Gilded Gold Stickles to the largest butterfly and then popped all three of them up with dimensional adhesive.

Here are some close-ups of the details:


And here is the frame once more, in situ, as it were:


And there you have it! A lovely reminder to Live Beautifully!

I hope you enjoyed my little frame. Remember, the Live Beautifully collection is only available for the month of May.

Now hop on over and see what the oh-so-talented Morgan Vogt has in store for you at Tweetscraps.

Have a wonderfully, creative week living your beautiful life!


15 April 2017

O Happy Day! It's Some Kinda Wonderful!


Hi All! Welcome to the Rose Blossom Blog Hop for the month of April! If you just hopped over from from the AMAZING Shelly Nemitz's blog, Just One Pretty Piece, you're in the right place.

This month we're featuring the fun and funky Some Kinda Wonderful collection by Close To My Heart.


I have to be honest, I wasn't certain I would like this collection. Oh how wrong I was! The bright, rich colors are fabulous to create with, and the funky fonts and fun icons can't help but make you smile. I've had a ball using it for cards, scrapbooking, gift packaging, planning, and for today's project: a simple, college-ruled composition book turned Fabulous Journal!

Let's take a look:


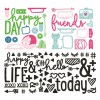
I started by covering the front and back of this journal with papers from the Some Kinda Wonderful collection. I added black glitter letters for the title, and then jazzed it up a bit more with stickers and other glitter accents (all from the Some Kinda Wonderful Compliments pack). I kept the layers fairly flat because this will be traveling with me.

Here's a collage of the close ups of the front:

And here's the back, which I kept very plain:


Now let's take a look at the inside covers.


I covered the inside front cover with Glacier cardstock and added a stash pocket. I matted the pocket and cover with patterned paper. I like to add my name and contact info in my journals in case I happen to said journal, so I created a little name plate from a 3 x 4 journaling card on the cut apart page included in the paper pack. I added a stickers from the compliments pack for a little extra somethin', and then turned to the back cover.


Here, I added a pocket that I made from a sheet of patterned paper and blinged it up with more stickers and black glitter compliments. 

And that's it! A fabulous journal just waiting to be filled!

Hope you enjoyed this project! Now for more inspiration hop on over to the FANTASTIC Mary Newman's blog, The Pixie Dust Playground. If you get lost along the way, here's a list of hop participants:

Kim {that's me!}

See you soon and have a wonderfully creative weekend!