The Marketplace @ Violets & Sunshine

Showing posts with label freedom. Show all posts

07 March 2014

We All Have Wings...But Some of Us Don't Know Why....


I enjoy all things winged--except the mosquito...it's hard to draw uplifting analogies from the mosquito. However, give me birds and butterflies, bees and dragonflies and I will have the time of my life creating with those images. There's something about flight that shouts "freedom." We talk about giving our souls and our hearts wings. We use terms like "soaring" and "flying" when we do what we love or when we experience joy. 

So lately I've been contemplating what it means to fly. (More specifically, what it means for me to fly.) It's more than doing what I want or even what I love. Those are part of it, but let's be honest, if doing what I want or what I love to do was the sum total of what it means to fly, I wouldn't get a whole lot of air time. Being a part of a family, a part of a community, naturally means that there will be a lot of time spent doing mundane things (like laundry) or less than thrilling things (like cleaning up after my children when they are sick). Things I'd rather not do. But does it follow that my wings get clipped and I get grounded every time I don't get my way? Ugh. There's no freedom in that. 

St. Irenaeus was purported to have said, "The glory of God is man fully alive." And it seems to me that the meaning of flight for me is found in that same idea. I fly when I am fully alive, when I am living in wide-eyed wonder drinking in all that God has created. When I am giving Him glory by choosing to do the mundane, or the less than thrilling, for no other reason than to serve others so they can feel their value and worth. When I'm creating for no other reason than because that is what I was created to do.  

I think there's more to flight than freedom. I think we see in the flight of birds and butterflies, bees and dragonflies...and, yes, even the mosquito, if we're honest...we see in them the beauty of creation doing exactly what it was created to do. Creation, fully alive.

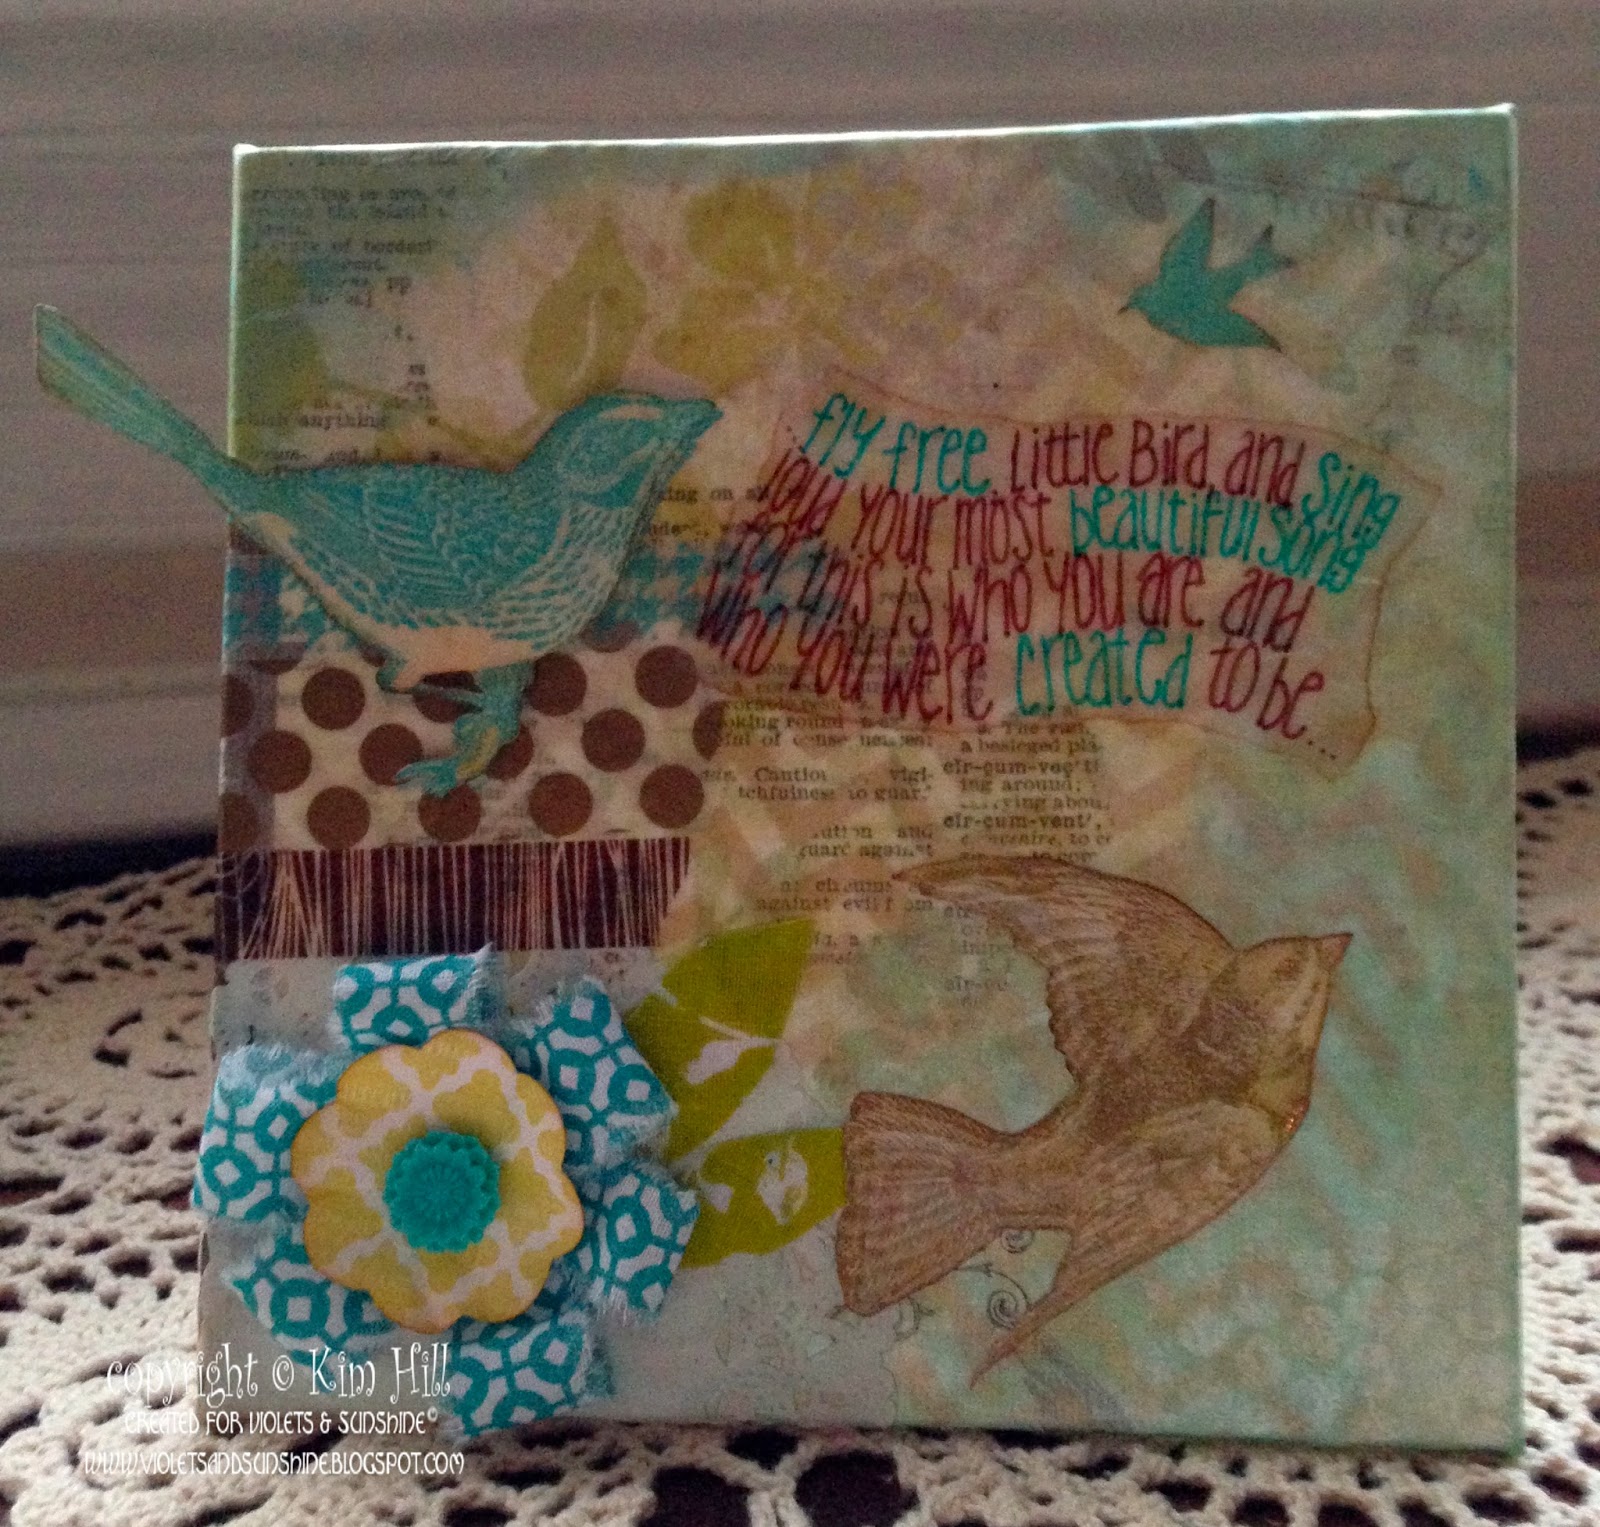
So today's project is the outgrowth of some of these thoughts. I used a 6x6 canvas board and covered it with Skylark paper by Close To My Heart. I then started layering all kinds of media: pearl paint, gold glimmer spray, icons cut from the Skylark paper, stamps, Skylark fabric, etc. I used Mod Podge to adhere it all. I then added a little quote--from my head? from something I read? I have no idea. But I wrote it out on vellum using Sharpie markers and glued it down using Mod Podge as well. When everything was dry, I went back over the quote with the Sharpies to make it pop a little more. And that's it. (I put a list of supplies at the end of the post.)

Here are some close ups:


And here it is again with one of my lovely long-tailed birds that had been my grandmother's:


I hope you enjoyed this little out of the ordinary project. And I hope you fly!


Supplies used in this project:

20 June 2013

Time to play in the Rose (Blossom) Garden!


Hi All! I hope your summer is off to a fabulous start! We're at the Eastern Shore (MD) this weekend enjoying a little quality time for Father's Day. The count down to our trip to Florida (and the Close To My Heart National Convention!) is in full swing.

Today is "Play in the Garden" day here at Violets & Sunshine. Are you ready for another challenge? It's time to make something fun using the Birthday Boy key on CTMH's Artiste Cricut Cartridge. As usual, I tried to think outside the cartridge box on this one, and here's what I came up with:


So what do you get when you turn a start-spangled party hat upside down? Why the perfect little patriotic wall pocket of course! I cut the party hat at "fit to page"from CTMH Glitter Paper, and then cut the same size from White Daisy cardstock to use as a liner. I glued the two together with wet glue for a very sturdy wall pocket. (You will want to use hot glue some other strong adhesive when you make it into a cone.) I cut the large stars from White Daisy and Cranberry cardstocks and the Outdoor Denim patterned paper from our Tommy collection. Each color of star was cut at 3, 3.25 and 3.5 inches. I layered the larger two together using wet glue and added a white pipe-cleaner between the layers. I then added the final star with dimensional adhesive and accented it with a little bit (or a lot...) of Silver Glitz. I cut the banner from Glitter Paper using "fit to page" and then sized it down in .25-inch increments and cut it again from Cranberry cardstock, Tommy paper and White Daisy cardstock. I layered the pieces and folded one end around a bamboo skewer so that it would look like a flag. Before adhering it to the skewer, I stamped the word "Freedom" in Outdoor Denim Exclusive Ink using the Urban Alphabet stamp set. I then adhered the flag to the skewer and wrapped the skewer with pipe-cleaners so that it matched the stars. I added extra stars to the flag that were left over from the hat cutouts. I used Color Ready Seam Binding for a hanger, which I tied through the holes that are already cut in the hat for just that purpose. I added some red crinkle paper and some red, white & blue bakers twine from my stash to finish it off. 

Here are a few close ups:


And here it is proudly hanging on my backdoor. (It's not easy taking a picture of something hanging on a glass door!)


 I hope you are inspired by my little patriotic party-hat-turned-wall-pocket. Don't forget to play along with us in the Rose Blossom Garden. The challenge winner this month will take home the fantastic "Perfect Fit Dad" stamp set.
Is that fun, or what?!

Look forward to seeing all the fun creations you can come up with!