The Marketplace @ Violets & Sunshine

Showing posts with label mixed media art. Show all posts

02 May 2017

The Best Kind of Homework....

Hi All! So if you follow me on social media, you know that I spent this past weekend in Columbus, Ohio at Simon Says Create 2017. What a fabulous event! We had classes taught by Tim Holtz, Jennifer McGuire, Kristina Werner, Dawn Woleslagle of W+9, and Yana Smakula. It was fantastic! In addition to the classes, there were a number of companies present showing their latest releases and doing Create and Takes. I'll be posting some of those projects on my social media this week, so if you're not following me yet, please do! {Here are the links for Instagram, Facebook, Pinterest, and Twitter.}

Today's project, however, was one that I couldn't finish there. It was a Create and Take brought to us by the lovely folks at JilliBean Soup.  The project was so popular that I could never actually get in to do it. However, when I went back the next day, they were kind enough to put together a kit of the previous day's project so I could take it home! (I'll post pics on Instagram of the second project, which is an adorable [and super easy] shaker card.) So let's take a look:


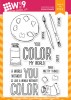
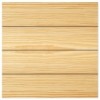
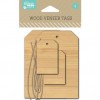
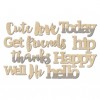
This little decor piece is made from a 6x6 Wood Plank Pine 3D base. The kit included a bunch of paper tags, which I cut down to cover part of the base.  (I made sure to leave some of the wood texture peeking through.) They also threw in two wooden tags, a burlap tag and a large canvas tag, which I didn't end up using. (But I will...oh yes, I will....) I covered the large wooden tag with more of the paper included in the kit, and offset the wooden and burlap tags to create an embellishment. I added yellow seam binding to both tags and tied them with bakers twine (from my stash) and heavy twine (from the kit). I then added the wooden words "hello" and "Today" (from the kit) to the the small tags and glued them to a cork circle that I had left over from one of the classes. I then added it to the base. I also had a corrugated paper diamond also leftover from a class, so I cut it in half and added the triangles to the bottom of the piece to give it more interest and texture. I stamped the word LIVE to the large tag using Close To My Heart's May 2017 Stamp Of The Month: Live, Laugh, Love, and did a little heat embossing in white. I also stamped flowers from the same set onto patterned papers from the kit, heat embossed them in white, and fussy cut them to embellish the project further. I added a flower sequin from Studio Katia to the middle of each flower and then added a gem from Jillibean Soup's Birthday shaker mix to the top of the sequin for a little extra bling. I then stamped sentiments from Close To My Heart's limited edition Live Beautifully stamp set (it's only available through May, as well). After I glued the flowers and tag in place, I felt like the piece needed something else, so I stamped the words "INSPIRE," "CREATE," and "EXPLORE" from Wplus9's Color My World stamp set onto patterned paper from the kit, heat embossed them in white, cut them out and popped them up using foam tape. Finally, I added gold shimmer to the tag, flowers, wooden words, and to the edges of the little words, and called it done.

Here's a closer look at some of the elements:


The cool thing about this particular base is that it can either stand alone (like you saw in the first picture) or it comes ready to hang:


So I hope you enjoyed this little project! Don't forget to check out Instagram and Facebook to see some of the other projects from the weekend.


Have a wonderfully creative week!


25 January 2017

You Make Me Happy!

Hi All! Thought I'd share a card that I made using a variety of media and Close To My Heart's January Stamp Of The Month: Adore You. Let's take a look:


For the base of the card, I used Kraft cardstock cut to 4 1/4 x 11 inches and scored at 5 1/2 inches to make a top folding card. 

For the card front, I cut two stitched ovals from White Daisy and Woodgrain cardstocks. I stamped and heat embossed the sentiment in gold on the White Daisy cardstock and then replaced it in the Woodgrain frame. I then went to work on the background, blending Peeled Paint, Faded Jeans, Chipped Sapphire, Seedless Preserves, and Aged Mahogany Distress Inks. I followed that up with a sprinkling of water and then blended Picket Fence and Hickory Smoke Distress Crayons into the Woodgrain paper to create a more weathered appearance. 

Since I was making this into a shaker card, I cut the same oval from two layers of craft foam that were slightly smaller than the card front. Since they were white, I went around the edges of the foam layers with an Aged Mahogany Distress Marker. I added the craft foam frames to the card base and fitted the sentiment oval into the frame and attached it to the base as well. I then added a mix of sequins and glitter, attached a piece of acetate to the front, and then layered the Woodgrain cardstock frame to the front. 

To finish off the card, I used metal foliage flowers and leaves hardware that I "sewed" together with hemp twine. I used this element to anchor the second sentiment, which I stamped onto Kraft cardstock in Archival Black ink and then added a distressed feel to the piece with Aged Mahogany and Seedless Preserves Distress Ink along with a little Hickory Smoke and Picket Fence crayons just for fun. I added the sentiment and embellishment to the front of the card with foam tape.

Here's a few close-ups:

And here's a look at the card "mid-shake":


And here are a couple more pictures for good measure:


It's been a while since I've done a card that was this technique heavy. It was so much fun, I really should do more. I hope you've enjoyed it seeing it as much as I enjoyed making it!

Remember, the January Stamp Of The Month retires next week, so get it while you can.
In the meantime, have a wonderfully creative day!


01 October 2015

Layers of Twinkle!


Hi All! Welcome to the Rose Blossom Blog Hop featuring Close To My Heart's October Stamp Of The Month: Twinkle. 


If you just hopped over from the super talented Shelly Nemitz's blog, Just One Pretty Piece, you're in the right place. If you started with me, or get lost along the way, there's a list of blog hop participants at the end of this post. Now on with the project....


So for this project, I decided to think outside the box a little. (I know, what box, right?!) Anyway, when I saw the ornament stamp, I knew I needed to make a poinsettia out of it, but when all was said and done, the flower was too big for a card. And so my little home decor frame was born. 


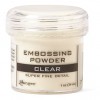
For the poinsettia, I stamped the leaves in first and second generations of Pomegranate ink using the back of the stamp. (That means I attached the stamp to the block on the striped side.) I then stamped stripes on the lighter (second generation) leaves with the same Pomegranate ink, and stamped the darker (first generation) leaves with Ruby ink. For the green leaves, I again used the back of the stamp and stamped two layers of Fern ink. I added stripes using New England Ivy. For a little extra zip, I edged all the leaves with gold embossing powder and heat set them. For the center of the flower, I used glittered hearts from the Gold Fundamentals Assortment pack, and topped it with a Gold Bling Gem.


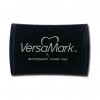
I stamped the frame for the Believe sentiment in VersaMark ink and heat embossed it using gold embossing powder. I then inked around the edges with Cashmere ink to give it a little bit of an aged look. Finally, I stamped the sentiment in Ruby ink and added a little bling to the "i" for extra sparkle.


I wanted a simple background in the center area. So I painted it cream and added some random streaks of gold Rub 'n Buff. I then stamped the Noel, Peace, and Joy sentiments from the stamp set onto the background in Chocolate ink. The ink reacted with the Rub 'n Buff (which has an almost waxy finish) to give it a shadow look that I really liked. (You can se it in the picture above.) I also added some sparkle flourishes around the frame to tie everything together.


The frame is a simple 4x4 inch wooden frame that I picked up for a dollar at my local craft store. I used several coats of paint on it, along with Rock Candy Distress Crackle Paint. After the crackling was dry, I added more cream and gold paints. (There are A LOT of layers on this frame.)

Here's one more look:


And that's it! I hope you enjoyed this merry little twinkle. Now, hop on over to the crazy-talented Morgan Vogt at TweetScraps and see what inspiring goodies she has for you today. And here's a list of blog hop participants if you get lost along the way.

Kim {you are here!}

Have a wonderfully creative day!