The Marketplace @ Violets & Sunshine

Showing posts with label handmade card. Show all posts

15 June 2017

No Worries! It's All Good....


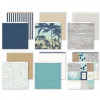
Hi All! Welcome to the Rose Blossom Blog Hop for June featuring Close To My Heart's No Worries collection. And I'm here to tell ya folks, it's ALL good! If you just hopped in from the fabulous Shelly Nemitz' blog, Just One Pretty Piece, you're in the right place. This collection is perfect for documenting the lazy days of summer.  Take a look:


I've been creating like mad with these papers and complements, and it's been a breeze. Everything coordinates beautifully, and the paper designs are perfect for all sorts of non-scrapbooking needs. Like a farewell card, for example:


I needed a couple of these cards this month for friends who are moving home to other parts of the world.

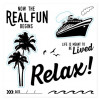
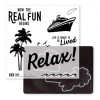
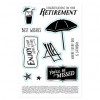
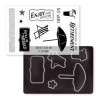
I used kraft cardstock for the card base, and layered it with Sapphire cardstock and No Worries paper. (LOVE those cabana stripes). I stamped the palm trees image from the No Worries Scrapbooking stamp set directly on the middle panel using Sapphire ink, and then stamped the image again on the White Daisy panel inside the card for a lighter, second-generation look. I then used Desert Sand ink to stamp the bottom edge of each panel with the sand texture stamp from the No Worries Cardmaking stamp set. I used the same stamp and some ink-blending techniques to create a beach look on the inner panel as well. I decided to create my own embellishments for the front using stamps and coordinating thin cuts from the No Worries Cardmaking set. I stamped the umbrella in Sapphire ink, the sentiment in Cranberry, and the starfish on the inside in second generation Sapphire, Cranberry, and Lagoon inks. I cut everything out with the coordinating Thin Cuts, but decided to cut the extra white edge off the star fish. For the deck chair, I stamped it twice--once in Desert Sand and once in Lagoon--and cut both out with the Thin Cuts. I then cut the striped fabric from the Lagoon chair and pieced it onto the Desert Sand chair. I then popped every thing up with foam tape.

Here's a look at some close ups:


And here's the card once again:


I hope you liked my little farewell. I know you're going to LOVE this collection, so you definitely want to go check it out here. In the meantime, hop on over for some AMAZING inspiration from Morgan Vogt at Tweetscraps.

Have a wonderfully creative week!


11 February 2017

With Enough Coffee....

Hi All! Just wanted to pop in and share a card I made using the Simon Says Stamp February Card Kit. The kit sold out quite some time ago, but I'll have links at the end of the post for the supplies I used. Now let's take a look at the card.


For the base of the card, I cut a piece of Neenah Desert Storm cardstock to 4 1/4 x 11 inches and scored it at 5 1/2 inches to create a top-folding A2 sized card. I rounded the bottom corners of the card and then stamped the card base with images from the Simon Says Stamp Coffee & Tea stamp set in Desert Sand ink by Close To My Heart. I accented three of the hearts on the card base by tracing them with my White Signo Gel Pen.

I layered a piece of patterned paper from Doodlebug Designs Cream & Sugar 6x6 paper pad that was cut to 3 1/4 x 4 1/2 inches. I cut down a piece of White Daisy Cardstock an inch smaller than the patterned paper and stamped the sentiment toward the top in Cocoa ink and popped it up on the card using foam tape. I cut banners from patterned papers in the Cream & Sugar paper pad and adhered them together. I then wrapped some hemp twine around one end of the banners and aded them to the card front using tape runner and foam adhesive. Finally, I added some absolutely adorable puffy stickers (also by Doodlebug) to the front to finish it off.

Here are a few close-ups of the sentiment and those stickers:


And here's one more look at the card:


I've made quite a few other cards using this kit, including a few valentines, so stay tuned! In the meantime, have a wonderfully creative day!


25 January 2017

You Make Me Happy!

Hi All! Thought I'd share a card that I made using a variety of media and Close To My Heart's January Stamp Of The Month: Adore You. Let's take a look:


For the base of the card, I used Kraft cardstock cut to 4 1/4 x 11 inches and scored at 5 1/2 inches to make a top folding card. 

For the card front, I cut two stitched ovals from White Daisy and Woodgrain cardstocks. I stamped and heat embossed the sentiment in gold on the White Daisy cardstock and then replaced it in the Woodgrain frame. I then went to work on the background, blending Peeled Paint, Faded Jeans, Chipped Sapphire, Seedless Preserves, and Aged Mahogany Distress Inks. I followed that up with a sprinkling of water and then blended Picket Fence and Hickory Smoke Distress Crayons into the Woodgrain paper to create a more weathered appearance. 

Since I was making this into a shaker card, I cut the same oval from two layers of craft foam that were slightly smaller than the card front. Since they were white, I went around the edges of the foam layers with an Aged Mahogany Distress Marker. I added the craft foam frames to the card base and fitted the sentiment oval into the frame and attached it to the base as well. I then added a mix of sequins and glitter, attached a piece of acetate to the front, and then layered the Woodgrain cardstock frame to the front. 

To finish off the card, I used metal foliage flowers and leaves hardware that I "sewed" together with hemp twine. I used this element to anchor the second sentiment, which I stamped onto Kraft cardstock in Archival Black ink and then added a distressed feel to the piece with Aged Mahogany and Seedless Preserves Distress Ink along with a little Hickory Smoke and Picket Fence crayons just for fun. I added the sentiment and embellishment to the front of the card with foam tape.

Here's a few close-ups:

And here's a look at the card "mid-shake":


And here are a couple more pictures for good measure:


It's been a while since I've done a card that was this technique heavy. It was so much fun, I really should do more. I hope you've enjoyed it seeing it as much as I enjoyed making it!

Remember, the January Stamp Of The Month retires next week, so get it while you can.
In the meantime, have a wonderfully creative day!