The Marketplace @ Violets & Sunshine

09 October 2017

Baby It's Cold Outside...

...Or at least it should be!


Hi All! Welcome to the Kraft-y Hearts blog share featuring Close To My Heart's October Stamp Of The Month: Christmas Tunes.


This cute little stamp set will have you humming your favorite Christmas tunes while you work on those Christmas cards and gifties for the holidays. 

Today's project focuses on those "gifties"--in this case, two of the gifts for my kids' teachers. Let's take a look:


This little faceted box is all over YouTube right now, and is made with the We R Memory Keepers envelope punch board. (But be warned, it's not for the crafty faint of heart.) I created my boxes from Kraft paper and then layered them with papers from the Beary Christmas paper packet from Close To My Heart. The tops of the boxes are also layered with Cranberry and Glacier cardstocks. 

I decorated the tops using two of the stamps from the set. I stamped the images in Memento Tuxedo Black ink on White Daisy cardstock and colored them with my alcohol ink markers (both Copic and ShinHan). I then fussy cut them and added them to the box tops with foam tape. Finally, I added mini magnets to the inside for closures.

Here's a closer look at the box:


And here's a look at one of them opened:


Finally, here's a close up look at each of the tops:


Since it's October, I DID refrain from actually playing Christmas tunes while making these, but it wasn't easy! Remember, the Christmas Tunes stamp set is only available through the month of October. Now hop on over to From My Bungalow and see what the AMAZING Lynn Darda has for your inspiration!

Here's to a wonderfully creative week!


02 September 2017

Feel(ing) So Blessed!


Hi All! Welcome to the Kraft-y Heart Blog Share featuring Close To My Heart's September 2017 Stamp Of The Month: Feel So Blessed. If you haven't hopped over to see  the incredibly talented Lynn Darda at From My Bungalow yet, don't miss it! She will certainly inspire your creativity! But first, let's take a look at this fantastic new stamp:


I love this stamp set, from the fun fonts to the whimsical images. And the sentiments are not only great reminders, but look beautiful on cards and scrapbook pages alike. HOWEVER, I thought I'd showcase them in a little home decor piece that I created to auction off later this month at the Rose Blossom Operation Smile Crop. (For more on Operation Smile, click here).

Let's take a look:


This shadow box frame is decked out for fall and ready to show off 2x3 photos of three of your favorite blessings.

To decorate the frame, I used patterned papers from the new Falling For You paper pack by Close To My Heart, along with embellishments from the Falling For You Complements pack. Here's a closer look: 

For the main sentiment, I inked up the stamp in Saffron ink, then rolled the edges in the new Nutmeg ink and stamped it on White Daisy cardstock. I then stamped the sentiment again in Fern ink and cut out the "Beautiful" and added it to the original sentiment. I popped that up on Fern cardstock that I had stamped with two laurel branches toward the bottom. I popped that up on a panel of Kraft cardstock layered with patterned paper and then popped the whole thing up in the frame. I then finished things off with a badge button from the complements pack and a smattering of bronze sequins from the Bronze Sequin mix.

For the "Blessed" element, I stamped 2 feathers in the new Pewter ink on some scraps of striped vellum and fussy cut them. I attached them to the back of the Blessed die cut from the complements pack and added some flower stickers. I finished the embellishment off with a burlap bow and some Gold Shimmer Pen on the flowers.

To decorate the bottom compartment, I layered Kraft cardstock with patterned paper and then popped a 3x4 card from the cut-apart page in the paper pack onto that. I added the "Bloom" sentiment from the Falling For You Scrapbooking stamp set in Fern ink, and then stamped the "with Gratitude"sentiment from Feel So Blessed in Nutmeg ink on Fern cardstock. I cut that sentiment into a banner and popped it up on the card. I finished it off with more bronze sequins.

 For the left side of the frame, I added 2 spots for photos and two decorative areas. The decorative pieces in each compartment were layered like the two on the right side of the frame, I just changed the sentiments a bit.
For the "So Grateful..." compartment, I stamped "grateful" onto patterned paper in Fern ink and "for this" in Nutmeg ink on Kraft cardstock. I fussy cut the "for this" out and popped it up below "grateful." The "so" is from the complement stickers and is also popped up. I added bronze sequins to finish it off and to tie it in to the elements on the left side of the frame. 

The "Thankful" sentiment is stamped in Nutmeg ink on Kraft cardstock and popped up on patterned paper. I added a little chevron detail to the pattern paper using a stamp from Feel So Blessed and Nutmeg ink. To finish things off, I added two sticker strips above and below "thankful" and two sequins. I popped up an acorn sticker toward the bottom that I had embellished with Gold Shimmer and Liquid Glass.

Finally, I added a little extra something with a paper rosette, a badge button from the complements and a little burlap string. 

Here's the whole project, one more time:

I hope you like this little piece. If you happen to be at the Rose Blossom Operation Smile Crop this month, remember to bid high! Let's make as many people smile as we can! And remember, the Feel So Blessed stamp set is only available during the month of September.

Happy crafting!


15 June 2017

No Worries! It's All Good....

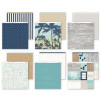
Hi All! Welcome to the Rose Blossom Blog Hop for June featuring Close To My Heart's No Worries collection. And I'm here to tell ya folks, it's ALL good! If you just hopped in from the fabulous Shelly Nemitz' blog, Just One Pretty Piece, you're in the right place. This collection is perfect for documenting the lazy days of summer.  Take a look:


I've been creating like mad with these papers and complements, and it's been a breeze. Everything coordinates beautifully, and the paper designs are perfect for all sorts of non-scrapbooking needs. Like a farewell card, for example:


I needed a couple of these cards this month for friends who are moving home to other parts of the world.

I used kraft cardstock for the card base, and layered it with Sapphire cardstock and No Worries paper. (LOVE those cabana stripes). I stamped the palm trees image from the No Worries Scrapbooking stamp set directly on the middle panel using Sapphire ink, and then stamped the image again on the White Daisy panel inside the card for a lighter, second-generation look. I then used Desert Sand ink to stamp the bottom edge of each panel with the sand texture stamp from the No Worries Cardmaking stamp set. I used the same stamp and some ink-blending techniques to create a beach look on the inner panel as well. I decided to create my own embellishments for the front using stamps and coordinating thin cuts from the No Worries Cardmaking set. I stamped the umbrella in Sapphire ink, the sentiment in Cranberry, and the starfish on the inside in second generation Sapphire, Cranberry, and Lagoon inks. I cut everything out with the coordinating Thin Cuts, but decided to cut the extra white edge off the star fish. For the deck chair, I stamped it twice--once in Desert Sand and once in Lagoon--and cut both out with the Thin Cuts. I then cut the striped fabric from the Lagoon chair and pieced it onto the Desert Sand chair. I then popped every thing up with foam tape.

Here's a look at some close ups:


And here's the card once again:


I hope you liked my little farewell. I know you're going to LOVE this collection, so you definitely want to go check it out here. In the meantime, hop on over for some AMAZING inspiration from Morgan Vogt at Tweetscraps.

Have a wonderfully creative week!