The Marketplace @ Violets & Sunshine

Showing posts with label altered frame. Show all posts

02 September 2017

Feel(ing) So Blessed!


Hi All! Welcome to the Kraft-y Heart Blog Share featuring Close To My Heart's September 2017 Stamp Of The Month: Feel So Blessed. If you haven't hopped over to see  the incredibly talented Lynn Darda at From My Bungalow yet, don't miss it! She will certainly inspire your creativity! But first, let's take a look at this fantastic new stamp:


I love this stamp set, from the fun fonts to the whimsical images. And the sentiments are not only great reminders, but look beautiful on cards and scrapbook pages alike. HOWEVER, I thought I'd showcase them in a little home decor piece that I created to auction off later this month at the Rose Blossom Operation Smile Crop. (For more on Operation Smile, click here).

Let's take a look:
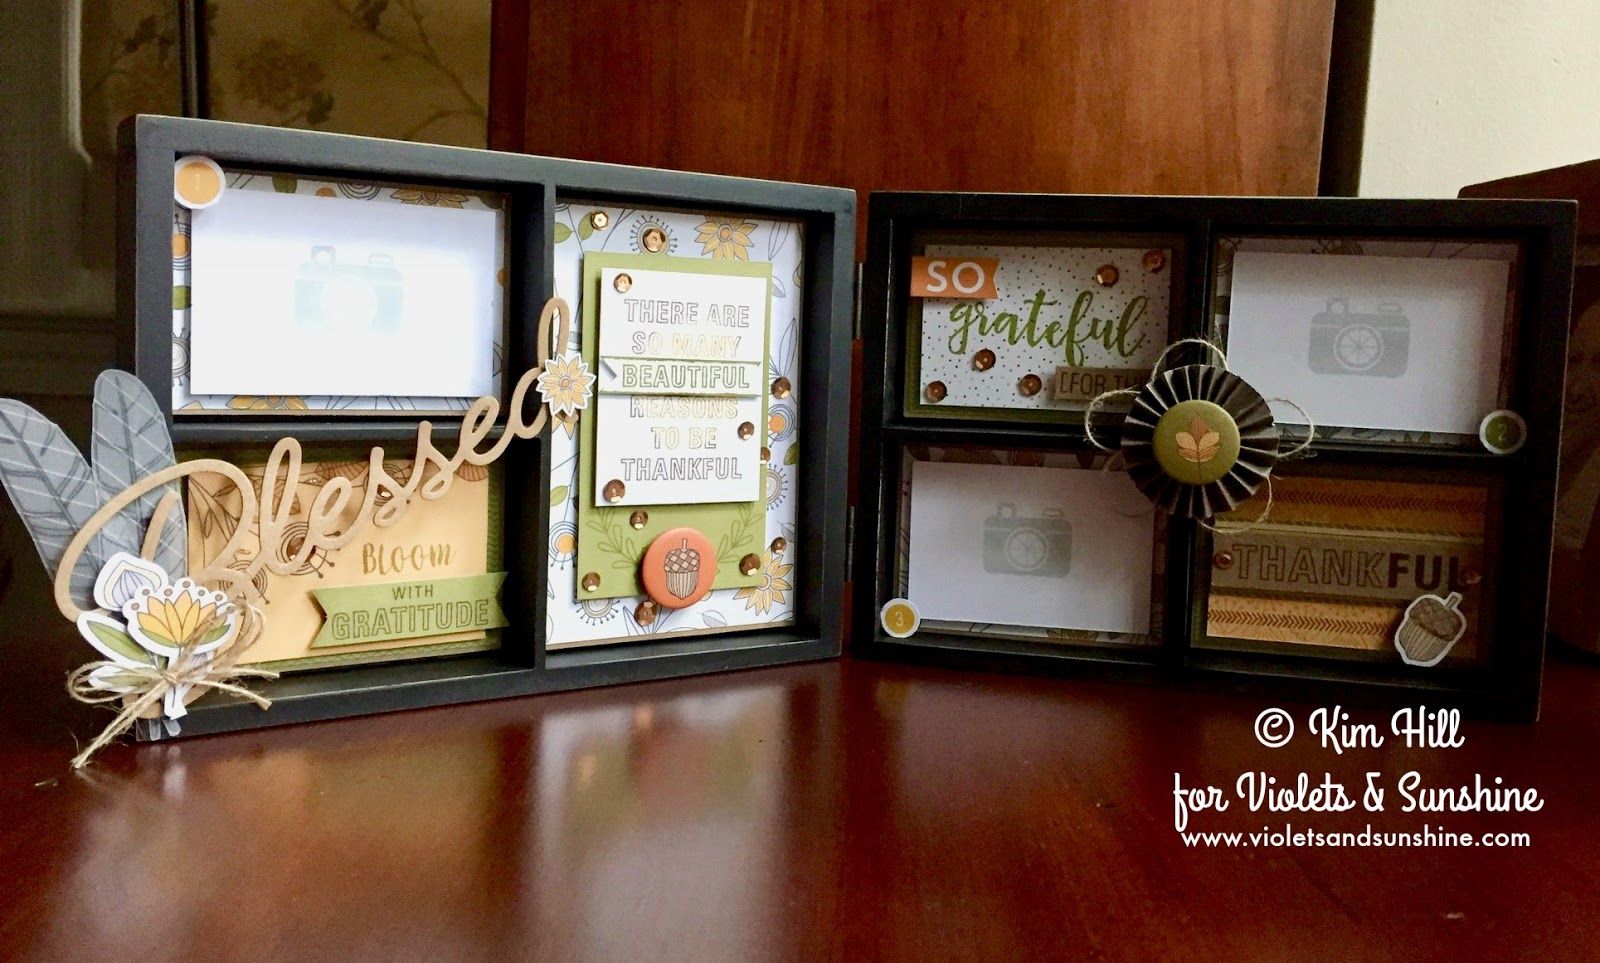

This shadow box frame is decked out for fall and ready to show off 2x3 photos of three of your favorite blessings.

To decorate the frame, I used patterned papers from the new Falling For You paper pack by Close To My Heart, along with embellishments from the Falling For You Complements pack. Here's a closer look: 

For the main sentiment, I inked up the stamp in Saffron ink, then rolled the edges in the new Nutmeg ink and stamped it on White Daisy cardstock. I then stamped the sentiment again in Fern ink and cut out the "Beautiful" and added it to the original sentiment. I popped that up on Fern cardstock that I had stamped with two laurel branches toward the bottom. I popped that up on a panel of Kraft cardstock layered with patterned paper and then popped the whole thing up in the frame. I then finished things off with a badge button from the complements pack and a smattering of bronze sequins from the Bronze Sequin mix.

For the "Blessed" element, I stamped 2 feathers in the new Pewter ink on some scraps of striped vellum and fussy cut them. I attached them to the back of the Blessed die cut from the complements pack and added some flower stickers. I finished the embellishment off with a burlap bow and some Gold Shimmer Pen on the flowers.

To decorate the bottom compartment, I layered Kraft cardstock with patterned paper and then popped a 3x4 card from the cut-apart page in the paper pack onto that. I added the "Bloom" sentiment from the Falling For You Scrapbooking stamp set in Fern ink, and then stamped the "with Gratitude"sentiment from Feel So Blessed in Nutmeg ink on Fern cardstock. I cut that sentiment into a banner and popped it up on the card. I finished it off with more bronze sequins.

 For the left side of the frame, I added 2 spots for photos and two decorative areas. The decorative pieces in each compartment were layered like the two on the right side of the frame, I just changed the sentiments a bit.
For the "So Grateful..." compartment, I stamped "grateful" onto patterned paper in Fern ink and "for this" in Nutmeg ink on Kraft cardstock. I fussy cut the "for this" out and popped it up below "grateful." The "so" is from the complement stickers and is also popped up. I added bronze sequins to finish it off and to tie it in to the elements on the left side of the frame. 

The "Thankful" sentiment is stamped in Nutmeg ink on Kraft cardstock and popped up on patterned paper. I added a little chevron detail to the pattern paper using a stamp from Feel So Blessed and Nutmeg ink. To finish things off, I added two sticker strips above and below "thankful" and two sequins. I popped up an acorn sticker toward the bottom that I had embellished with Gold Shimmer and Liquid Glass.

Finally, I added a little extra something with a paper rosette, a badge button from the complements and a little burlap string. 

Here's the whole project, one more time:

I hope you like this little piece. If you happen to be at the Rose Blossom Operation Smile Crop this month, remember to bid high! Let's make as many people smile as we can! And remember, the Feel So Blessed stamp set is only available during the month of September.

Happy crafting!


15 May 2017

Live Beautifully


Hi All! Welcome to the Rose Blossom Blog Hop for the month of May featuring the limited edition Live Beautifully Collection by Close To My Heart. If you just hopped over from the incomparable Marg Van Patten's blog, I didn't Have Potatoes, you're in the right place!

So May is National Scrapbooking Month and to celebrate, Close To My Heart has released the limited edition (available through the end of May) Live Beautifully collection:


This limited edition collection offers something for everyone. If you're a scrapbooker, cardmaker, or just all around paper crafter, check out the gorgeous paper pack (that includes specialty papers with gold foiling) and stamp set. If you like things quick and easy and beautiful, there's the Live Beautifully Cut Above Kit that has all that you need to make 5 lovely layouts including page protectors (you just bring a little adhesive). And if you just need the whole thing from start to finish, there's a bundle that includes a beautiful album, adhesive, the Cut Above Kit, and even an archival safe journaling pen so you can tell your story.

So what am I making with Live Beautifully? I'm so glad you asked!

Let's take a look:


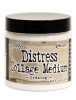
I began by covering this little frame with two of the patterns in the Live Beautifully collection. I added a black and white zip strip from the top of one of the papers to the inner edge of the frame to create a more finished look. I then sealed the paper with Ranger's Distress Collage Crazing Medium, and let it dry. After the frame was dry, I hid the seam between the papers by adding gold shimmer ribbon from the Uptown ribbon pack and layered that with the crochet ribbon from the Rustic Home ribbon pack to give it a more shabby chic feel.

To embellish the frame, I stamped a sentiment from the Live Beautifully stamp set in VersaMark ink and heat embossed it in gold. I then stamped the main sentiment from the Beautiful Moments stamp in VersaMark ink on a scrap of dotted kraft cardstock from the Rustic Home Fundamentals paper pack, and heat embossed it in gold as well. I also heat embossed images from the Keep Dreaming stamp set in gold on vellum, and used my Prismacolor pencils to color the images on the reverse side. (The rose image is actually embossed in gold sparkle embossing powder, while the leaves are in the same gold as the sentiments.) Once I was finished coloring the images, I fussy cut them and added them to the front of my frame, along with a nest of gold thread and jute twine (which is really just strands I cut from the jute ribbon in the Rustic Home ribbon pack. After arranging the flower, I thought the frame still needed a little something. So I dug into my stash and found some paper butterflies and a few black sparkles. I added Gilded Gold Stickles to the largest butterfly and then popped all three of them up with dimensional adhesive.

Here are some close-ups of the details:


And here is the frame once more, in situ, as it were:


And there you have it! A lovely reminder to Live Beautifully!

I hope you enjoyed my little frame. Remember, the Live Beautifully collection is only available for the month of May.

Now hop on over and see what the oh-so-talented Morgan Vogt has in store for you at Tweetscraps.

Have a wonderfully, creative week living your beautiful life!


15 November 2016

Merry & Bright


Hi All! Welcome to the Rose Blossom Blog Hop featuring the Happy, Happy Christmas Album Bundle by Close To My Heart. If you've just arrived from the always-inspiring Lynn Darda's blog, From My Bungalow, you are in the right place. Now on with the inspiration!


During the month of November, Close To My Heart is offering a special that includes a beautiful red My Legacy Album and enough paper, cardstock, and bling and the instructions to create five 2-page 12x12 inch scrapbook layouts. All for 10% off the retail price. This is actually a HUGE amount of product, so we in the Rose Blossom Blog Hop Crew decided to see what else we can make with the leftovers and supplies from our stash. Let's take a look....

I had this cute little heart frame in my stash that I picked up at one of my local craft stores for $1. I decided to use some of the My Crush Christmas pages that I had leftover from the layouts to alter the frame and make it into a home decor piece, complete with a shaker window. The acetate that I used to cover the heart and create the window is from the Happy, Happy Christmas overlays set. I used stamps and dies from the Woodland Wishes set to create a little rustic scene and then finished the whole thing off with jute ribbon from the Rustic Home Ribbon pack. The shaker elements are a combination of the Cool Breeze mix by Lucy's Cards and Attic Findings by 28 Lilac Lane. I also added some White Enamel Accents and Diamond Stickles by Ranger to the trees, snowflakes and heart frame around the window, and shimmer using the CTMH Shimmer Brush to the deer antlers for some extra bling.

Here's a collage of close-ups:
And here is the project once again:

I hope you enjoyed this little winter shaker frame. Now hop on over and see what the amazing Morgan Vogt has for your inspiration at TweetScraps.

Have a wonderfully creative week!