The Marketplace @ Violets & Sunshine

Showing posts with label Thanksgiving. Show all posts

16 November 2014

Rose Blossoms Holidays Blog Hop: So Grateful for....


Hi All! Welcome to the Rose Blossom Blog Hop Holiday Edition. I'm batting second in the line-up so if you've just hopped over from Rose Blossom Legacies, you're in the right place. If you're just starting with me, you should hop back and see what the ever-inspiring Brenda Rose has for you. 

So I decided to go with a Thanksgiving project today using the Close To My Heart Design Decor Colonial White Frame, which comes with a honeycomb wire insert. Let's take a look:


I decided to make a gratitude board for my family. I used retired Burlap and Chocolate Striped gross grain ribbons to decorate the frame, and added a cork and wooden button from the Pathfinding Assortment pack. The leaves are stamped using the Fall Harvest stamp set and Chocolate pigment ink. Pigment inks are perfect for heat embossing, so I used Ranger Clear Super Fine embossing powder to emboss the leaves. I then sponged the leaves using Ruby, Canary, Barn Red, Autumn Terracotta, Goldrush and Olive Exclusive Inks. I then fussy cut the leaves and added them to the frame with hot glue.

The banner is made using the Bodacious Banner stamp set, the Art Philosophy Cricut Cartridge, and Barn Red, Autumn Terracotta, Goldrush, and Chocolate Exclusive Inks. Though the banners fit beautifully on the Art Philosophy cuts, I decided I didn't want the 1/8th of an inch margin around the stamps so I cut it off. The letters in "Gratitude" are stamped in Chocolate ink on Glacier cardstock using the alphabet stamp set that is included in the Artfully Sent Cricut Collection. I tied the pennants together using strands of burlap from the Burlap Ribbon.

The tag holder and tags are cut from Kraft Cardstock and embellished with Pathfinding paper, Chocolate and Glacier cardstocks, Chocolate Gros Grain ribbon, and a little cork embellishment from the Pathfinding Assortment. The tags have Topiary Mini Chevron ribbon pulls and little "I'm Thankful For" flags that are stamped in Glacier Exclusive ink using the Thankful Heart stamp set.

Here are a couple of close-ups:


And here's a look at what I'm most grateful for in my life:


So I hope my little project sparked some ideas for you. For more inspiration hop on over to the über talented Lynn Darda's blog From My Bungalow and see the beautiful project she has in store for you. If you get a little lost along the way, here's a list of blog participants:

Kim {that's me}


21 November 2013

Kraft-y Hearts Blog Share: Give Thanks (part 1)

Hi All! Welcome to the Kraft-y Hearts Blog Share for the month of November. This month, I decided to make a mini gratitude album using Close To My Heart's Flip Stand Album. Because there's so much to this fun little project, I'll be featuring it all three days of the blog share. So let's take a look!


For all but the cover page in this little album, I used Kraft cardstock and patterned paper from the Huntington Collection by Close To My Heart.

One of the things that I really like about the flip stand is that you can easily remove the hardware in order to slide a piece of patterned paper between the plexiglass frame to customize your stand. It's such a simple way to create a very professional looking project.

Now, let's take a look at the pages:


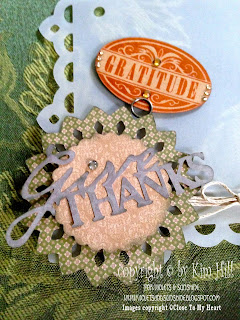
The first page, above, is cut from vellum that I happened to have in my stash. (I thought it made a nice cover page.) This page, and all of the other base pages featured in this album, are cut from the Artiste Cricut cartridge. The "gratitude" sentiment is from a retired CTMH set and is stamped in Autumn Terracotta Exclusive ink on Kraft cardstock. The "give thanks" embellishment is cut at 3 inches, using Artiste cartridge and Huntington paper. I added tan bitty sparkles and hemp twine for a little accent.

To add interest to this little album, I cut the pages in a variety of shapes and sizes using the mini album page cuts on the Artiste cartridge. The page above is a shorter page with a postage stamp edge. The front has a little picture folder that ties close, and the back is a simple photo mat. The stamped images and sentiment on the front of the page are from a retired stamp set. The pumpkin image on the back of the page is from the Count Your Blessings stamp set and "give thanks" is from the Perfect Fit--Thanksgiving stamp set. I used Autumn Terracotta, Cocoa, and Desert Sand Exclusive inks for the stamping, and Slate Exclusive ink to ink around the edges of the pages throughout the album.


This next page is a very plain base page cut from Kraft cardstock. I added a little album of cardstock and patterned paper for photos. The album is sewn together with hemp twine. I staggered the page lengths and added different edges for interest. The "blessed" sentiment is also from the Count Your Blessings stamp set and is stamped in Autumn Terracotta Exclusive ink. I used a little foam tape between the layers to give the embellishment dimension. A wooden clothes pin from the Mini Medley Wooden Accents does double duty as a closure and cute embellishment.

I added another photo folder on the back of the page. The front is a little poem from one of the zip strips on the Huntington paper. The leaves are punched from Huntington paper. The background layer is Chocolate cardstock, on which I stamped leaves in Cocoa Exclusive ink using the Fall Harvest stamp set (a personal fave). I purposely adhered the folder so that it opened to the right. That way the clothes pin on the front could also act as a closure for is little folder. The inside photo mats are made with Barn Red cardstock and a Huntington zip strip. I used a fancy corner punch on the photo mats to add a little visual interest.

I hope you are enjoying this fun little project. I can't wait to show you more of it tomorrow! For more inspiration today, don't forget to stop over at From My Bungalow and see what the super talented Lynn Darda has in store!


19 November 2013

Coming Soon: The Kraft-y Hearts Blog Share 21-23 November

Hi Folks! Here's a little sneak peek of one of the projects I will be featuring this week during the Kraft-y Hearts November Blog Share:


The Blog Share will run from Thursday to Saturday (21-23 November). You don't want to miss it!


15 November 2013

It's All About Gratitude


Hi All! Happy Friday! It's time to answer another Rose Blossom Garden Challenge. Don't you just love going into the weekend with a little crafty inspiration? This months' challenge is all about Thanksgiving. Lately I've been pondering a little quote I read that says, "Gratitude makes what we have enough." Wow! That's been pretty convicting for me! Thinking about Thanksgiving, then, I wanted to do something that would be a reminder of that powerful little truth. Here's what I came up with:


For this project, I started with an unfinished wooden 12x12 inch tray that I picked up at my local craft store. I layered it with various paints and finishes to give it a distressed look. I then used Mod Podge to cover the bottom of the tray with fabric from Close To My Heart's Sarita textiles collection.  Using the Artbooking cartridge, I cut out the overlay on the "b" key from Kraft Cardstock. (I used the recommended measurement of 11 inches.) The overlay has a nice area for journaling on the right side if you're using this for a scrapbook layout. However, I wanted a lighter look, so I cut around the tree on the right side so that the background would show through, like so:


Using the negatives from the overlay cutout for templates, I cut various leaves and the tree trunk from the Sarita paper pack and did some paper piecing to add interest. I then cut "Gratitude" and "Enough" at 1 3/4 inches using Artbooking. I used both Colonial White cardstock and Sarita for the letters, and inked the edges with Goldrush Exclusive ink. The "makes what we have" phrase is stamped in Stāz-On Opaque White ink using the retired "You Are My Happy" alphabet. Since I was putting several layers of Mod Podge over everything, I wanted to make sure the white ink wouldn't fade or run. Stāz-On plays well with Mod Podge.  "Gratitude" got lost in the tree, so to make it pop, I backed it with Burlap ribbon and added some copper brads for interest. (Love mixing all the different textures!)


I decided that the edges needed something more, so I added a strip of scalloped Goldrush cardstock to the top. The little flower in the middle is cut from Burlap ribbon, bronze glitter paper (which matches the Bronze Shimmer Trim at the bottom), Sarita fabric and a button from the Rosewood mini medley collection.


For the bottom, I pleated a piece of Sarita fabric and then added the Bronze Shimmer Trim to give it a finished look.


Finally, I added antiqued copper studs (also from the Rosewood collection) in each corner for a little extra texture.


And there you have it! My little gratitude reminder. For more inspiration, be sure to go see what my fellow design team members have created in the Rose Blossom Garden