The Marketplace @ Violets & Sunshine

Showing posts with label artbooking cricut cartridge. Show all posts

15 June 2016

Note To Self(y): Go Big...


Hi All! Welcome to the mid-month Rose Blossom Blog Hop featuring artwork from some of Close To My Heart's retiring Cricut Cartridges. If you just hopped over from the fabulous Shelly Nemitz' blog, One Pretty Piece, you are in the right place.

Today is the last day of school for my kids. Woo HOO! (We're all a bit ready for summer.) So last Friday we hosted an end of the year selfy party for the girls in our art club. All good selfy parties need props, and this is where my Cricut came to the rescue. Let's take a look:


(You gotta do the whole Polaroid thing when you're talking about selfies!) So I went through the icons in all of the CTMH cartridges and came up with the above images from Artiste (retiring [insert heartbroken wail here]), Artistry, and Artbooking. I then sized them REALLY BIG and cut them from  a variety of glitter papers, many of which are also retiring. I then attached them to bamboo skewers (my 1/4-inch wooden dowls went AWOL) and they were ready to go. (I also added an extra cardstock layer to both pairs of glasses to make them a little sturdier since the frames were relatively thin.)

Here's a look at the party set up. (I left the "Polaroid" filter on the pictures for fun.):


The top hat, lips, and bouffant hair are Cricut images. I added an Artistry bow to the hair that matches the hat band.

And that's it! 

The girls had a ball! We had made mini albums in one of the art classes for the party and by the end of Friday they were full of pictures and memories. It was a fantastic ending to a semester of art, and a great beginning for a summer full of adventures.

Now hop on over and see what the lovely Morgan Vogt has for your inspiration at Tweetscraps. And if you get lost along the way, here's a list of the hop participants:

Kim {that's ME}

Have a happy and creative week!


SaveSave

01 December 2014

CYBER MONDAY!


Hi All! We interrupt our regularly scheduled blog share for this FABULOUS, NEVER BEFORE SEEN Cyber Monday Special from Close To My Heart!

Today only, ALL CRICUT COLLECTIONS are 20% OFF!!! Yep, it's true! From now until 11:59 PM MST (Mountain Standard Time), you can get any of the fantastic Close To My Heart Cricut collections for 20% off. Been wanting to make some boxes and bags to package your Holiday goodies? You'll be wanting the Artiste Collection then. Hoping to create spectacular 3 dimensional cards for every occasion? Pick up the Artfully Sent Collection. Are mini albums and brag books on your to-make list? The Artbooking Collection is for you. And if you need a general cartridge that can be used to embellish any or all of the above and more, then grab the Art Philosophy Collection. 

These collections make the perfect gift for the Cricut crafter on your list! And remember, pumpkin hour is 11:59 PM MST tonight! 

That is all.

We now return you to your blog share already in progress....

17 April 2014

Kraft-y Hearts Blog Share: Hello Spring!


Hi Gang! It's day two of the Kraft-y Hearts Blog Share celebrating spring! Spring is absolutely the loveliest time to be in Washington, DC. The trees and flowers are blooming and the temperatures are warm, but not the sweltering heat that is our summer. It is hands down my favorite season here.

Today's project is my little tribute to the DC spring:


I picked up this unfinished little tray at my local craft store a while back and thought it would be perfect for a home decor piece. I really like the way it turned out. To begin with, I painted the tray white with basic acrylic paint. After letting it dry, I added a coat of Close To My Heart's Create-a-Shade pearl paint to add just a bit of shimmer. Next, I covered the inside bottom of the tray with paper from the Ariana Paper Pack. I added a coat of Mod Podge to seal it. Then I cut out "Hello" and "Spring" using the Artiste Cricut cartridge. I cut the words from Outdoor Denim cardstock and Ariana Paper. (This might be my favorite pattern from that pack. If you look closely at the stripes they look like Oxford cloth.) I layered the two to give the sentiment a shadow so it would pop against the patterned paper. I adhered the words to the tray with Mod Podge. Next, I cut flowers and leaves from Ariana Paper using the Artbooking Cricut cartridge. I inked around the edges of the leaves with Saddle Exclusive ink and then used Liquid Glass to adhere them and the flowers to the tray (dry adhesives do not stick to Mod Podge very well.) I then added some Sparkle flourishes and pearls for a little bling.

Here are a couple of close ups:


So spring-y! And the Cricut cartridges really did make the project a breeze. Remember, this month you can get your choice of Cricut Collections when you become a Consultant with Close To My Heart.


If you would like to join my team or purchase any of the Close To My Heart products used in this project, come on by and see me here.

Now, hop on over and see what the always fabulous Lynn Darda has in store for you at her Bungalow.


18 December 2013

A Christmas Mini (part 3)

Hi All! Welcome to part 3 of the Christmas mini share. We'll finish up looking at the last pages today. If you missed the previous posts, you can find them here, here, and here.

Page six was cut from Frosted pattern paper. "merry" is cut out of the page, but since it's pattern paper, I wanted to reinforce it a bit. We'll take a look at that when we look at the back of the page. For the photo mats, I added piece of Frosted pattern paper and then used a photo mat from Artbooking as an overlay. I didn't glue the whole thing down so that I could slide 2x2-inch photos in later. The little tag is from the Frosted Stickease assortment. I inked around the edges of everything with Saddle Exclusive ink and added strips of tan glitter paper for sparkle. I also added a little star sticker and blue sparkle to highlight "merry."


Here are some close-ups"


The back of the page is designed to display a 5x7-inch photo. I used a strip of Frosted paper as both contrast on the back page and reinforcement for the "merry on the front. For interest, I used the scalloped border punch on the patterned paper and then inked everything with Saddle Exclusive ink. For the embellishment, I combined a sticker from the Frosted Stickease assortment, a snowflake punched from tan glitter paper and sections of a Frosted zip strip.  The photo mat was cut from Kraft cardstock.


The seventh page was cut from Frosted Grey cardstock (exclusive to the Frosted Paper pack). I cut the page down a bit to make sure that "christmas" was protected by the album covers. I've left this page without embellishment because I haven't decided if it's going to house pictures or Christmas cards. We'll see. But I do love the "word-on-the-edge" pages!


The eighth page is cut from Kraft cardstock. (I used the holly and berries cut-outs on an earlier page.) The holly can really stand on its own as an embellishment, so I just added a zip strip for interest.


Here's a close-up of the holly cut:


For the back of the page, I added a large piece of Frosted patterned paper, which also anchors the holly on the front. (Love the double duty this paper does!) For embellishment, I added strips of tan glitter paper and a strip of Frosted pattern paper, along with snowflakes punched from tan glitter paper. I also inked around the edges of the paper and page with Saddle Exclusive ink.


Here's a close-up of the embellishment:


Finally, let's take a look at the inside back cover. If you've been following this blog, then you know that I love pockets. There's no way I could make a Christmas mini and not add a pocket! This pocket is a mini page from the baby album in Artbooking cut from Frosted paper. I folded it a little differently to make it into a coin-style envelope. I inked around the edges in Saddle Exclusive ink and adhered it to the back cover with very strong adhesive.


Here's a look at it opened:


And there you have it! My 2013 Christmas Mini Album. I hoped you enjoyed it! Be sure to tune in the rest of the week for the upcoming Kraft-y Hearts Blog Share. I'll be featuring some not-to-be-missed simple, last-minute gift/stocking stuffer ideas.


17 December 2013

A Christmas Mini (part 2)


Hi All! Welcome back to day two of my Christmas Mini pages. If you missed the cover and/or the first couple of pages you can find them here and here. Now on with the show….


The third page is an under cut page with sporting a cut-out "25." I used Kraft cardstock for the page and inked the edges with Saddle Exclusive Ink. I used stickers from the Frosted Stickease assortment and tan glitter paper to decorate the page and to give it more dimension.

Here's a close-up:


The ornament is cut from tan glitter paper using the Artbooking cartridge. I couldn't resist adding a little light blue sparkle to the smallest snowflake. (Is there such a thing as too much bling? I think not!)

To get the most from this page, I decided to add photo mats to the back that could showcase 3x3 photos. The beauty of double-sided paper is that the top photo mat also provides a beautiful background to the "25" on the front. I also used my snowflake punch, Frosted paper, blue sparkles, and Frosted Stickease to add just a little something extra to the page without taking up too much room.


Here's a couple of close-ups of the embellishments:


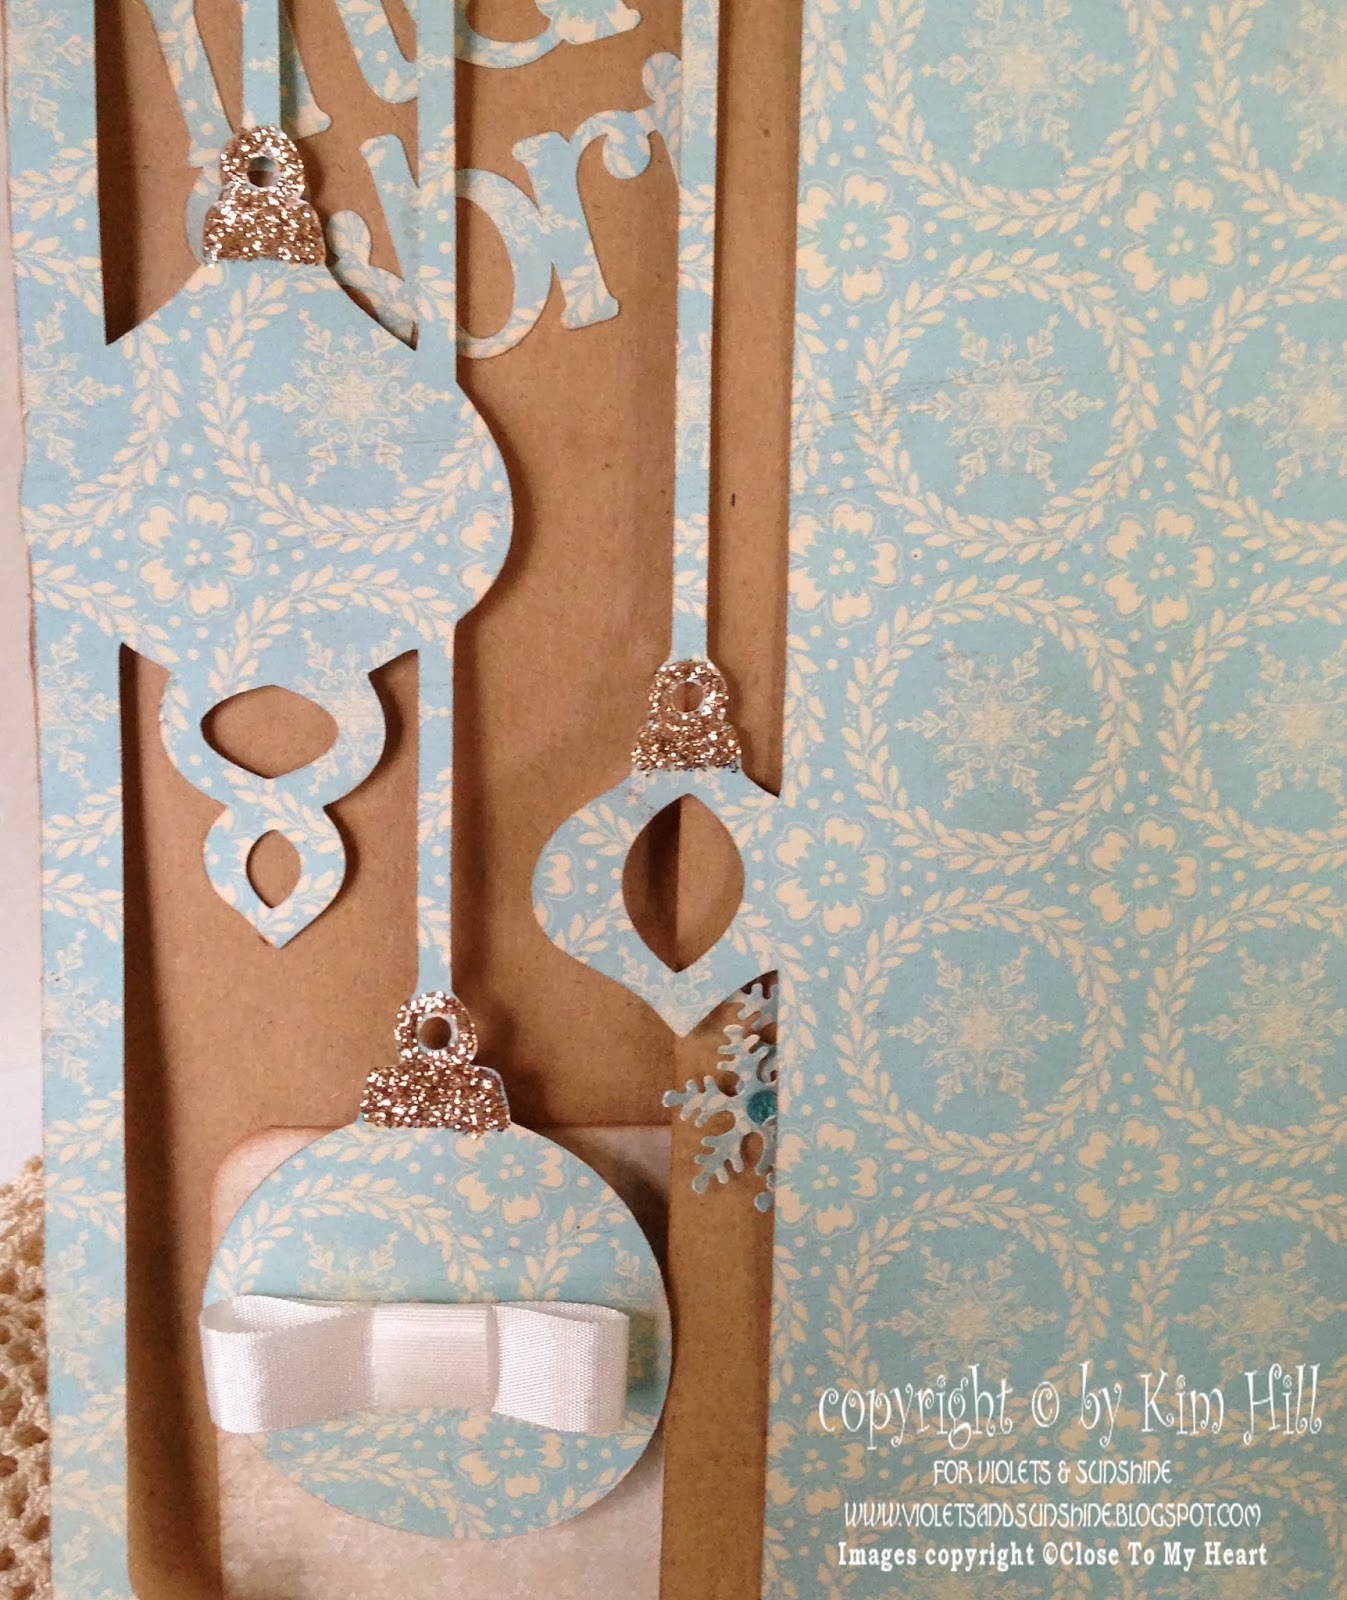
The fourth page is one of my favorite cuts. I decided not to layer it over a base page (which is how it's presented in the Artbooking handbook) so that you could see the page behind it. Also, because the pattern in the paper is rather busy (though beautiful), I didn't think it needed much embellishing. To that end, I added a little Almond Glitz Glitter Gel to the ornaments, along with a sticker and sparkle and some Color Ready Seam Binding Ribbon. I also inked around the edges of the page and the ornaments with Saddle Exclusive Ink to make them pop against the background of the next page.


Here are some close-ups of the ornaments:


Here is the back side of the page. I think this is my favorite pattern in all the Frosted papers (though it's very hard to choose). Again, I kept the embellishing to a minimum in order to let the paper speak for itself.

Okay, so one last page before we go today. The fifth page is a standard base page cut from Frosted Turquoise paper (exclusive to the Frosted paper pack).  To embellish this page, I added a holly spring and berries that were left over from cutting another page (which I will show you tomorrow). The holly is cut from Kraft cardstock to which I added Almond Glitz Glitter Gel for sparkle. I layered that on top of a strip of Frosted pattern paper for an elegant and simple bit of embellishment.


Here is a close-up of the holly:


The back of the page is embellished with ornaments and "Believe" all cut from Artbooking. "Believe" was cut from both Colonial White cardstock and Frosted paper. I layered them to help the word pop off the page. The base of the ornaments are cut from Frosted paper and their embellishments are from tan glitter paper. The top ornament is embellished with the "negative" of the embellishment cut and a blue sparkle.


Here are a couple of close-ups:


I hope you are enjoying a tour of the Christmas mini. We'll finish looking at the last of the pages tomorrow. Until then, have a wonderful day!