The Marketplace @ Violets & Sunshine

Showing posts with label colored pencil on vellum. Show all posts

02 June 2017

Kraft-y Hello


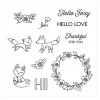
Hi All! Welcome to the Kraft-y Hearts Blog Share featuring Close To My Heart's June Stamp Of The Month: Hello Foxy. Check it out:

Isn't this a cute set? I love the fonts used in the sentiments, and the little fox sitting down is one of my all time favorite images. So let's take a look at the project for today:


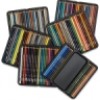
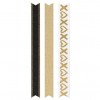
To create this little card set, I used a long-since-retired card making kit by Close To My Heart, which included the card bases and matching envelopes, the kraft cardstock and glitter banners, and a black banner that I trimmed down to fit my sentiment.

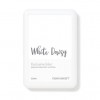
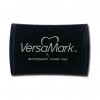
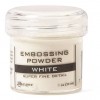
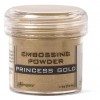
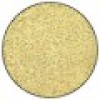
I began the cards by stamping the wreath images onto vellum with VersaMark ink and heat embossing them in white. I then colored the backs of the images using my ShinHan Touch alcohol markers and cut them out. I stamped the fox and flower images directly onto the card bases using White Daisy ink and then colored them with my Prismacolor pencils. I wanted the white ink to stand out a little more, so I went back over the image outlines with my white Gelly Roll pen. I stamped and heat embossed the sentiment on the black banners that were included in the kit, and then cut them down to fit into the center of the wreath.

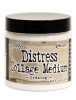
To put the card together, I layered the banners on top of each other and adhered them to the card base with my tape runner. I then added the wreaths to the banners using Matte Medium by Ranger. Finally, I popped the sentiments in place with foam tape.

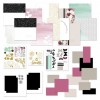
Here is a collage of close-ups:


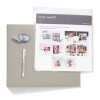
And here's a look at one of the cards and its matching envelope:


I hope you enjoyed this little set. Don't forget to stop by From My Bungalow and see what the amazingly talented Lynn Darda has in store for your inspiration. 

Have a wonderfully creative weekend!


15 May 2017

Live Beautifully


Hi All! Welcome to the Rose Blossom Blog Hop for the month of May featuring the limited edition Live Beautifully Collection by Close To My Heart. If you just hopped over from the incomparable Marg Van Patten's blog, I didn't Have Potatoes, you're in the right place!

So May is National Scrapbooking Month and to celebrate, Close To My Heart has released the limited edition (available through the end of May) Live Beautifully collection:


This limited edition collection offers something for everyone. If you're a scrapbooker, cardmaker, or just all around paper crafter, check out the gorgeous paper pack (that includes specialty papers with gold foiling) and stamp set. If you like things quick and easy and beautiful, there's the Live Beautifully Cut Above Kit that has all that you need to make 5 lovely layouts including page protectors (you just bring a little adhesive). And if you just need the whole thing from start to finish, there's a bundle that includes a beautiful album, adhesive, the Cut Above Kit, and even an archival safe journaling pen so you can tell your story.

So what am I making with Live Beautifully? I'm so glad you asked!

Let's take a look:


I began by covering this little frame with two of the patterns in the Live Beautifully collection. I added a black and white zip strip from the top of one of the papers to the inner edge of the frame to create a more finished look. I then sealed the paper with Ranger's Distress Collage Crazing Medium, and let it dry. After the frame was dry, I hid the seam between the papers by adding gold shimmer ribbon from the Uptown ribbon pack and layered that with the crochet ribbon from the Rustic Home ribbon pack to give it a more shabby chic feel.

To embellish the frame, I stamped a sentiment from the Live Beautifully stamp set in VersaMark ink and heat embossed it in gold. I then stamped the main sentiment from the Beautiful Moments stamp in VersaMark ink on a scrap of dotted kraft cardstock from the Rustic Home Fundamentals paper pack, and heat embossed it in gold as well. I also heat embossed images from the Keep Dreaming stamp set in gold on vellum, and used my Prismacolor pencils to color the images on the reverse side. (The rose image is actually embossed in gold sparkle embossing powder, while the leaves are in the same gold as the sentiments.) Once I was finished coloring the images, I fussy cut them and added them to the front of my frame, along with a nest of gold thread and jute twine (which is really just strands I cut from the jute ribbon in the Rustic Home ribbon pack. After arranging the flower, I thought the frame still needed a little something. So I dug into my stash and found some paper butterflies and a few black sparkles. I added Gilded Gold Stickles to the largest butterfly and then popped all three of them up with dimensional adhesive.

Here are some close-ups of the details:


And here is the frame once more, in situ, as it were:


And there you have it! A lovely reminder to Live Beautifully!

I hope you enjoyed my little frame. Remember, the Live Beautifully collection is only available for the month of May.

Now hop on over and see what the oh-so-talented Morgan Vogt has in store for you at Tweetscraps.

Have a wonderfully, creative week living your beautiful life!