The Marketplace @ Violets & Sunshine

Showing posts with label october stamp of the month. Show all posts

01 October 2015

Layers of Twinkle!


Hi All! Welcome to the Rose Blossom Blog Hop featuring Close To My Heart's October Stamp Of The Month: Twinkle. 


If you just hopped over from the super talented Shelly Nemitz's blog, Just One Pretty Piece, you're in the right place. If you started with me, or get lost along the way, there's a list of blog hop participants at the end of this post. Now on with the project....


So for this project, I decided to think outside the box a little. (I know, what box, right?!) Anyway, when I saw the ornament stamp, I knew I needed to make a poinsettia out of it, but when all was said and done, the flower was too big for a card. And so my little home decor frame was born. 


For the poinsettia, I stamped the leaves in first and second generations of Pomegranate ink using the back of the stamp. (That means I attached the stamp to the block on the striped side.) I then stamped stripes on the lighter (second generation) leaves with the same Pomegranate ink, and stamped the darker (first generation) leaves with Ruby ink. For the green leaves, I again used the back of the stamp and stamped two layers of Fern ink. I added stripes using New England Ivy. For a little extra zip, I edged all the leaves with gold embossing powder and heat set them. For the center of the flower, I used glittered hearts from the Gold Fundamentals Assortment pack, and topped it with a Gold Bling Gem.


I stamped the frame for the Believe sentiment in VersaMark ink and heat embossed it using gold embossing powder. I then inked around the edges with Cashmere ink to give it a little bit of an aged look. Finally, I stamped the sentiment in Ruby ink and added a little bling to the "i" for extra sparkle.


I wanted a simple background in the center area. So I painted it cream and added some random streaks of gold Rub 'n Buff. I then stamped the Noel, Peace, and Joy sentiments from the stamp set onto the background in Chocolate ink. The ink reacted with the Rub 'n Buff (which has an almost waxy finish) to give it a shadow look that I really liked. (You can se it in the picture above.) I also added some sparkle flourishes around the frame to tie everything together.


The frame is a simple 4x4 inch wooden frame that I picked up for a dollar at my local craft store. I used several coats of paint on it, along with Rock Candy Distress Crackle Paint. After the crackling was dry, I added more cream and gold paints. (There are A LOT of layers on this frame.)

Here's one more look:


And that's it! I hope you enjoyed this merry little twinkle. Now, hop on over to the crazy-talented Morgan Vogt at TweetScraps and see what inspiring goodies she has for you today. And here's a list of blog hop participants if you get lost along the way.

Kim {you are here!}

Have a wonderfully creative day!


19 October 2013

Kraft-y Hearts Blog Share Day 3: Merry & Bright


Hi All! Welcome to Day 3 of the Kraft-y Hearts' October Blog Share. Can you believe it's the last day already?! (Me either!)

Today's project is a little home decor piece I put together for you:


The base of this piece is one of the 6x6 canvas display frames by Close To My Heart. I covered the face of the canvas with paper from the Sparkle & Shine collection. (Love that silver hounds tooth.) The Merry and Bright sentiment is from the Sparkle & Shine Workshop On The Go stamp set. I stamped the sentiment in Ruby ink on White Daisy cardstock cut at 2 1/2 inches using the coordinating shape on the Art Philosophy Cricut cartridge. For the Candy Stripe and Ruby layers, I increased the cutting sizes by 1/4 inch for each layer. The little flags under the sentiment are stamped in White Daisy ink on Ruby, Juniper, and Slate cardstocks. The sentiments are from the October Stamp of the Month: Scandinavian Wishes. The large embellishment in the corner is made from gross grain ribbon from my stash and embellishments from the Sparkle & Shine assortment pack. The two long flags ("Celebrate the Season" and "Winter Wonderland") are cut from one of the Sparkle & Shine zip strips.  Finally, I added small Sparkle Flourishes and red rhinestones to give it a little extra sparkle and shine. To finish the edges of the canvas, I painted them silver and added a little ribbon that matches the front.

Here are some close-ups:


I hope this little canvas brightens your day! Thanks for joining us for this month's Kraft-y Hearts Blog share. Be sure to stop by From My Bungalow and see what beautiful inspiration the amazingly talented Lynn Darda has for you!

Enjoy the weekend!


10 November 2012

Yuletide Week In Review


Hi All! Here's the week in review of my cards for the 30 Days, 30 Cards challenge. I thought I would highlight the Close To My Heart products that I used in each of them for you.

(November 4th)
This card uses the Bundled Buddies and Snow Flurries stamp sets (both retired) from Close To My Heart for the animals and trees (stamped in brown staz-on ink). I colored the animals with our alcohol ink markers (Autumn Terracotta, Olive, Indian Corn Blue, Twilight, and Blush) and a white opaque gel pen, and added a little glitter gel to the hats. I sponged the trees with New England Ivy Exclusive ink.

(November 5th)
This card uses the little ornament stamps from the Pear & Partridge Card Kit Workshop, stamped in Bamboo, Gray Flannel, and Cranberry Exclusive inks. (Gray Flannel Exclusive has retired, but Whisper Exclusive ink would work just as nicely.) {be merry} is stamped in Olive Exclusive ink using the Glamour Lower Case alphabet stamped set.

(November 6th)
The sentiment for this card is from the October Stamp Of The Month set and is stamped in Olive Exclusive ink.

(November 7th-front)
(November 7th-inside)
The sentiment on the front of the card is from the October Stamp Of the Month using Chocolate Exclusive ink. I masked off part of the sentiment and added ellipses. The inside sentiment is stamped using words from one of the Art Philosophy Cartridge Collection stamp sets. To tie it all together, I added ellipses, an ampersand, and an exclamation point using a brown marker.

(November 8th)
Here I once again used a sentiment from the October Stamp Of The Month (I hope you were able to get this little gem of a set!) and stamped it in Cranberry Exclusive ink, with a little off-set second generation stamping to give it a vintage 3D look.

(November 9th)
For the sentiment on this card, I used the Glory to God stamp set, stamped in Olive Exclusive ink.

(November 10th)
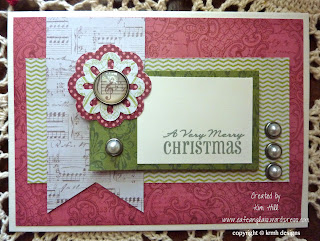
This card would look gorgeous in Pear & Partridge papers and Cranberry cardstock! The ribbon is Colonial White gros grain (currently on the While Supplies Last list). The sentiment is from the Pear & Partridge Card Kit workshop set and is stamped in Cocoa Exclusive ink. (This stamp set will be a go-to Christmas set for me for a long time. It's worth the kit alone!) I added some Opaque Pearl Gems for a little extra bling. It was such a fun and simple card to make, I'll probably use it to round out the last of my Christmas cards, using Pear & Partridge and probably Dakota papers. I'll post the results when I'm done.

I hope you enjoyed this bit of inspiration. For full details of the cards, visit me at The Feast. To order any of the above products, click on the links or feel free to browse here.