The Marketplace @ Violets & Sunshine

Showing posts with label thank you card. Show all posts

11 November 2016

So Much to Be Thankful For


Hi All! I have one more card to show you that I made using the Simon Says Stamp November Card Kit. 

Let's take a look:


I think this might be one of my favorite cards I've made in a long time. I created it using a retired falling leaf card front die by Top Dog Dies (a company that is no longer in business). I cut the panel from ivory cardstock and then covered it with the Copper Delicata ink that was included in the kit. The Delicata inks are pretty wet, so I had time to heat emboss it with clear embossing powder. I really wanted to give this the look of metal, so I went through the heat embossing process 3 times and over heated parts of it on the third time so that it deepened the color in some areas, giving it a bit of a distressed look. I then cut 1-1/8 inch squares of patterned paper from the scraps I had left and adhered them behind the leaves with Ranger's multi matte medium.

I decided to use vellum for the sentiment so that it didn't compete with the background. So, I stamped the sentiment from the Thankful Heart stamp set in VersaMark ink and heat embossed it with white embossing powder. I added a hemp twine bow that I made with 3 strands of twine and then glued the sentiment to the card front with matte medium, hiding the adhesive behind the bow and some of the letters. After the sentiment was secure, I popped the whole thing up on a White Daisy card base using foam tape.

Here are a couple of close-ups:


And here's the card again:


I hope these projects have been inspiring for you. It's amazing what you can make with 4 sheets of cardstock, some patterned paper and a few extra supplies.

Until next time...
Have a wonderfully creative weekend!


06 November 2016

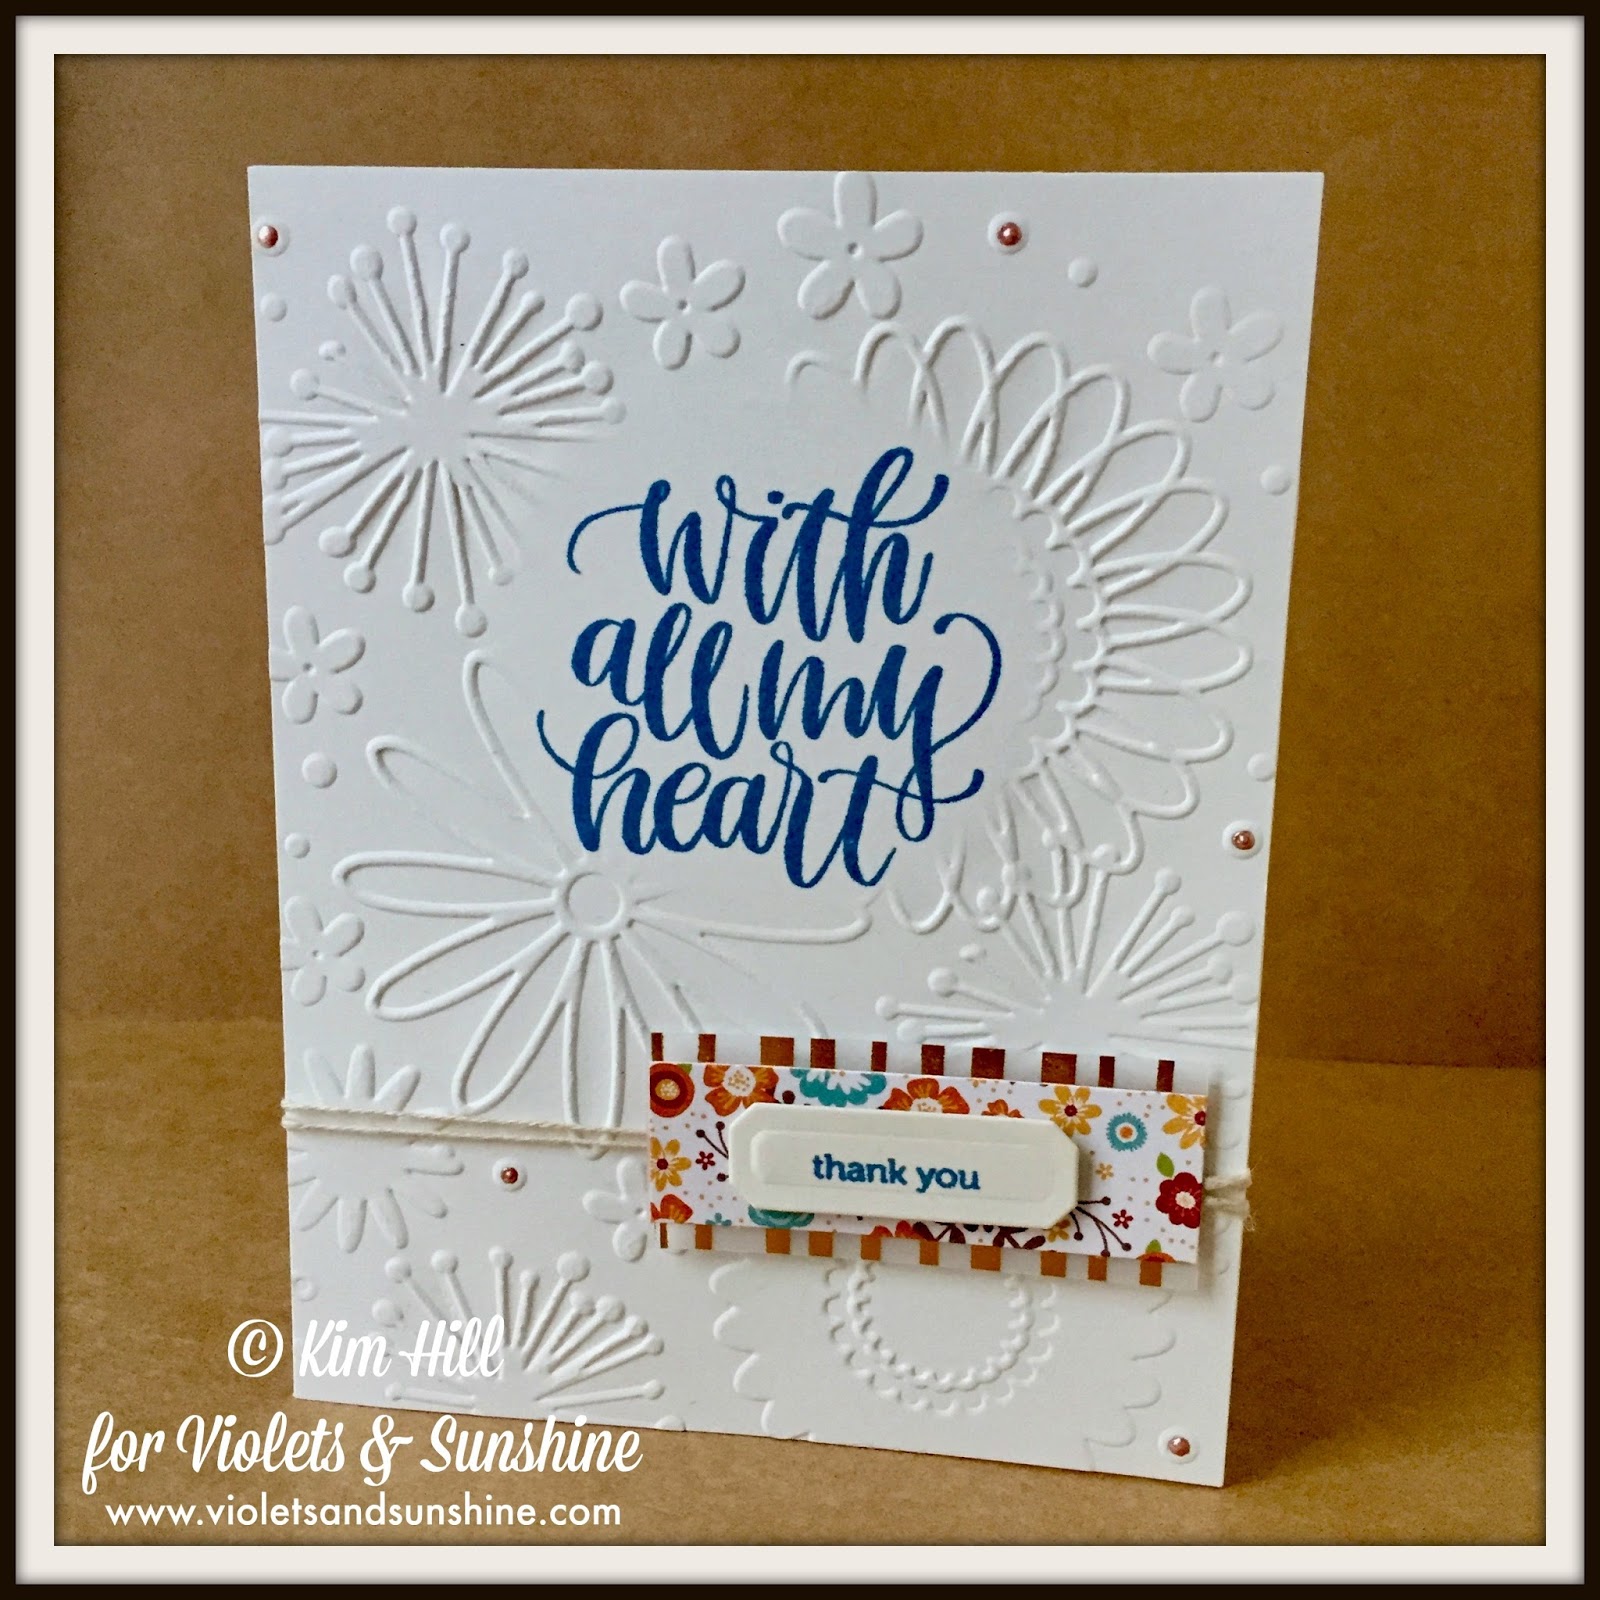
With All My Heart

Hi All! Welcome to another project using the November Card Kit by Simon Says Stamp. Today's cards feature the Thankful Heart stamp set and the Floral Frenzy embossing folder, which is included in the kit.

Let's take a look:


For this card, I cut a 4-1/4 x 5-1/2 inch panel from ivory cardstock and embossed it with the Floral Frenzy folder from the Simon Says Stamp kit and the circle embossing diffuser from Close To My Heart. The diffuser allowed me to leave a circular portion of the cardstock flat so that I could stamp my sentiment on it without any trouble.

I stamped the sentiments with Indian Corn Blue (now retired), and layered the "thank you" on scraps of patterned paper from the kit and copper foil vellum from the Rustic Home Fundamentals collection by Close To My Heart. I then popped the layers over some hemp twine from my stash using foam tape. I also added drops of Rose Gold Liquid Pearls to some of the embossed areas for a little extra pizazz. 

I made a second card using Olive ink (retired as well) and changed up the small sentiment to "love you." I then added the panels to Colonial White card bases.

Here's a couple of collages of close-ups for both cards:


And here are the two cards together:


These cards are so simple, just basic stamping and a few scraps. Still, the embossing folder really just takes the whole thing to the next level. 

Stay tuned for a couple more projects that I made with Simon Says Stamp's November kit. Until then, have a fabulously creative day!


13 July 2016

Color Me Thankful

Hi All! So if you've been following me on Instagram, you know that I've been participating in the Daily Marker's 30 Day Challenge. (#thedailymarker30day) If you haven't been following me on Instagram, please do! :) (Here's the link: @violets_n_sunshine)

Anyway, today's card was made from my Day 1 coloring piece. Let's take a look:


The base of this card is a standard A2 white notecard that I layered with gold and white striped paper from the retired "Happy Times" limited edition paper pack from Close To My Heart. I added a strip of black cardstock to the edge for contrast.

I etched the peonies onto vellum using Claritystamp's Peonies Groovi Plate and a stylus. I then colored the back of the vellum with my Prismacolor Colored Pencils. I added the layer to my card base using foam tape, and then hid the foam tape behind the banners and ribbon in the corner. Next, I cut "thanks" from black glitter cardstock using Lawn Fawn's Scripty Thanks die and popped it up on the card front with more foam tape. Finally, I added some clear Wink of Stella to the peonies for some extra shimmer and shine.

Here's a collage of close-ups:


And here's a look at the card once again:


I hope you enjoyed today's card. And don't forget to look me up on Instagram for more of #thedailymarker30day!

Have a fabulously creative day!


SaveSave


03 November 2015

Sharing Handmade Kindness

Hi All! Sorry it's been awhile. (I'm trying to resist the urge to pull the Moriarty-esque "Did you miss me?" thing...but it's tough!) ;)


This month, Jennifer Mcguire is hosting a challenge called "Share Handmade Kindness." It's a chance to take all those cards we make and pile on our desk, in our drawers or wherever, and get them sent.(That IS why we make them, right?) This week's challenge is to make something for friends and/or family.

SO today I'm showcasing a card I made to thank one of my friends for hosting a fantastic cooking class. Let's take a look:


For this card, I used a Colonial White card base and layered it with strips of Fern and Poppy cardstock from Close To My Heart's Enchantment Fundamentals collection. I also added a strip of Gold Shimmer Trim for some extra bling, and to tie in the gold on the front layer.

For that front layer, I used Close To My Heart's Harvest Wreath stamp set. I stamped the wreath in VersaMark ink on a 3 1/2 x 3 1/2-inch piece of Colonial White cardstock and heat embossed it with Gold embossing powder. I stamped the fruit on a scrap of Colonial white cardstock using the rock & roll stamping method and fussy cut them. (The ink colors I used for the fruit are: Lemons, Canary and Saffron; Pears, Saffron and Fern; Orange, Saffron and Poppy; and Pomegranate, Poppy and Pomegranate.) I stamped the small leaves in Fern and the larger leaves in New England Ivy, and fussy cut those as well. After arranging the fruit on the wreath, I added a gold bow using multiple strands of DMC gold embroidery thread. However, the gold on gold kinda got lost, so I added a bow of Poppy Thick Twine. I then stamped the greeting in Pomegranate ink on a little hand-cut tag and added it under the bow with gold thread and glue dots.

Finally, I layered the Colonial White panel onto a piece of Poppy cardstock and lifted the whole thing up using a 3x3-inch piece of craft foam.

Here are a couple of close-ups:

You can see the resist pattern on the Enchantment Fundamentals paper.
The other side has this same pattern in white.


And that's it! I can't wait for my friend to receive this in the mail! I have a couple of other cards to send this week as well. (Love this motivation!)

I hope this gives you a little inspiration to create and share some kindness this week. Make sure to stop by Jennifer Maguire's blog and get the details on this fantastic challenge!

Have a fabulously creative day!