The Marketplace @ Violets & Sunshine

Showing posts with label birthday girl. Show all posts

19 June 2015

Stretching my Card(making) Abilities....

Hi All! This weekend is the birthday of one of my daughter's best friends. My daughter made a tote bag for her friend and then asked me if I would be willing to make a card for her. "Of course," I said. And could it be nautical themed. "No problem," I said. And then I sat down to make a feminine, nautical-themed birthday card for a 13 year-old girl. [Insert the sound of a lonely cricket chirping in the erie silence here.] Yeah. Well. This was not as easy as I thought it would be.

So I went online for inspiration. My first (and last) stop was the Cardabilities blog. Any time I need a layered, feminine card sketch, that's where I go first, and they certainly didn't disappoint this time.

Here's the sketch:


Those pennants were all I needed to see. Here's my take:


The base of the card is cut to 4 1/4 x 5 1/2 inches from Outdoor Denim cardstock and layered with Kraft cardstock cut a quarter of an inch smaller than the base. The patterned paper is from the Tommy Collection, which retired sometime ago. I only have scraps left, but that's all I needed. The doily is from my stash. I used Outdoor Denim chevron ribbon (also retired) for the bow and added a little anchor charm from the Journey Charms pack. The sentiment is from the Happy Everything Operation Smile stamp set (a portion of the proceeds goes to Operation Smile), and is stamped in Cranberry ink on White Daisy cardstock. I popped the sentiment up with dimensional adhesive and then popped the layer up using craft foam. (Here is an excellent blog post and video on the benefits of using craft foam.) Finally, I finished the front of the card off with some pearl bling from my stash. (Pearls....oysters...ocean... Keepin' it nautical even in the bling!) 

Here are a couple of close-ups of the details:


And here is a look at the inside of the card:


The sentiments are also from the Happy Everything stamp set and are stamped in Cranberry and Outdoor Denim inks on White Daisy cardstock.

And here's one more look at the front:


So there you have it. A feminine, nautical-themed birthday card for a 13 year-old young lady. Whew! That definitely stretched my card ability! ;-)

Until later then....


16 January 2015

A Little Friday Free-style

Hi All! It's FRIDAY!!! Woo HOO!!!

Just thought I'd share a little project I did a while ago for the daughter of a good friend of mine.


Sophia is one creative kid, so for her 5th birthday last summer we threw an art party for her. This was the sign that I made for the party (which now hangs on her bedroom door). 

To make it, I covered an up-cycled canvas in black gesso and LET IT DRY. (We know the mantra right?) I decided to do the lettering using bright and bold papers from my stash. So I got out a variety of letter stencils-masks from Hazel & Ruby and used them to trace the letters, which I then fussy cut. Yes it did take a longish time, but it was worth it to achieve the look I wanted. I then attached the letters with Mod Podge and LET IT DRY.  After the Mod Podge dried, I doodled a couple of daisies on the canvas for interest using acrylic paint. When the doodles were dry, I have the whole thing another coat of Mod Podge and called it done.

Here are a couple of close-ups of the letters and doodles:


And here's one more look at the sign:


I hope you enjoyed a little canvas goodness today! Have a fantastic weekend!


14 September 2014

#Party Time!


Hi All! Welcome to the Rose Blossom Blog Hop celebrating #30yearsofhappy! If you've hopped over from Created By Barbara, you're in the right place. Did Barbara offer up some amazing inspiration or what???  If you're just joining in the hop, you can find a list of participant blogs at the end of this post.

Now on with the projects!

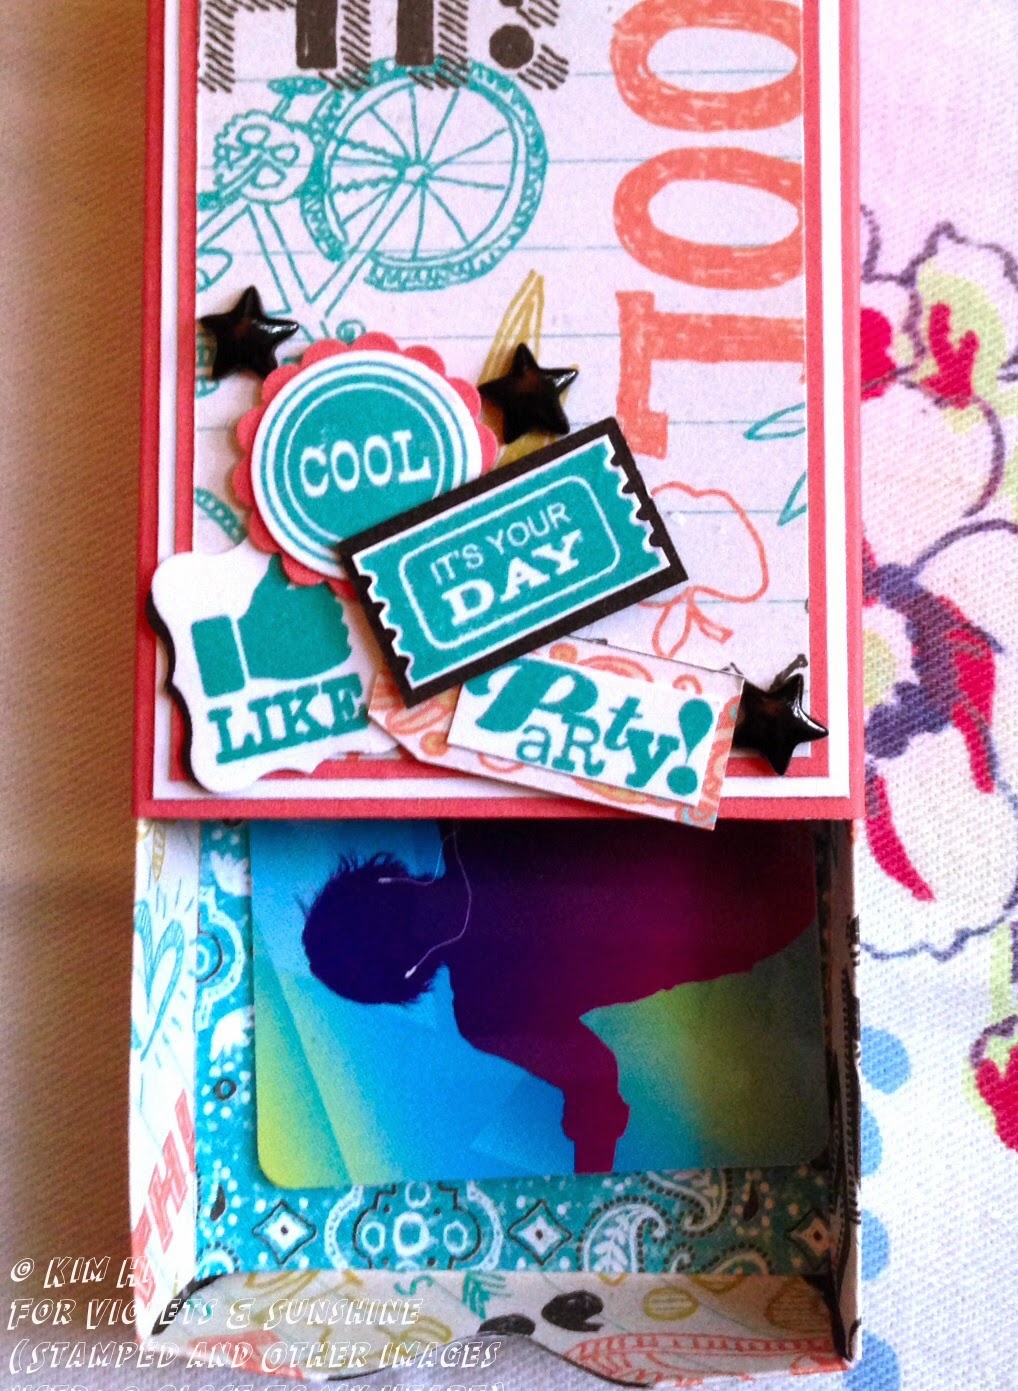
This month I needed packaging for 4 gift cards--3 for girls and 1 for a guy. I decided to go with a little matchbox that's big enough for a gift card and some candy. (I also made some matching  gift bags with enclosure cards.)

Let's take a look:


For the guy gift set, I used the mustache from #30yearsofhappy to make my own patterned paper, stamping it in Black Exclusive Ink on White Daisy cardstock. (He's having a "Mustache Party," so it's perfect!) The box, bag, and card are made from Black and White Daisy cardstocks. I decided to accent the box and card with other stamps from the same stamp set in Glacier and Goldrush Exclusive Inks. I also added a few black enamel stars--white stars would work too.

Here's some close-ups of the box and 3x3 card:


And here's a look at the bag:


Now let's take a look at the girls' set:


For the girls' boxes, cards, and bags, I used Smoothie cardstock and Chalk It Up paper. I added a little Chalk It Up Picture My Life card to the bottom of the box for some fun reinforcement. The sentiments are in Lagoon and Black Exclusive Inks. Let's take a look:


Here some close-ups and a look at the box when it is opened:


And the bag:


I hope you enjoyed these little gifties. Now hop on over and see what inspiration the oh-so-talented Shelly Nemitz has in store for you. If you want to start at the beginning of the hop (or if you've gotten a little lost), here's a list of the blog participants:

Kim Hill {That's Me}


15 May 2013

A Sweet Little Frame


Hi All! I can't believe it's already time for another Rose Blossom Garden Challenge! Where did May go?!? 

Today's challenge is to make something using the "Birthday Girl" key on Close To My Heart's Cricut Artiste cartridge. Here's my answer to the challenge:


I decided to make a couple of cupcake frames for Mother's Day gifts for my mom and mother-in-law. I cut the base of the cupcake at 5 inches first from chipboard and then from Dream Pop card stock. I also cut 3 bases from Black cardstock, inked the edges with Black Exclusive Ink, and used them on the back for a stand. I then cut two of the wrapper images from Dream Pop paper and one more from chip board. I layered one wrapper directly on the cupcake and one on the chipboard wrapper. I then cut three icing layers from Dream Pop and another from chipboard. I layered one image on the cupcake and one on the chipboard piece. I popped the chipboard layers up with dimensional adhesive. Before sticking them down, though, I sketched out an opening for the 2x2-inch Flip Flap that would house my photo. I cut both chipboard layers to the size of the desired opening. Once that was done, I inked the edges of the pieces with Sorbet Exclusive Ink and adhered them to the bottom layer. I added my photo and Flip Flap, and then the third icing layer, which was also inked with Sorbet Exclusive Ink. The third layer serves to camouflage the opening of the Flip Flap while still allowing you to change out the photos. I then blinged it up with bitty and medium size sparkles, a sparkle button from my stash, and Sunset Bakers Twine from the Paradise Assortment.


The back was made by layering one black cupcake on the back of the chipboard. I then layered two together to give them more weight and folded them down the middle. I attached one side of the fold to the chipboard and left the other side free to act as a stand.

Here are some close-ups of the bling:


I hope you enjoyed my sweet little frame. I look forward to seeing what creative projects you can come up with over in the Rose Blossom Garden!