The Marketplace @ Violets & Sunshine

Showing posts with label handmade Christmas. Show all posts

15 December 2015

Adding A Little Handmade Holiday Cheer


Hi All! Welcome to the Rose Blossom Blog Hop featuring some last minute handmade holiday ideas. If you just hopped over from the fabulous Shelly Nemitz's blog, Just One Pretty Piece, you're in the right place. If you're just starting here or you get lost along the way, I have a list of blog participants at the end of the post. Also, make sure you hop by Brenda Rose at Rose Blossom Legacies--she's giving away some lovely goodies! 

I love the idea of handmade holidays, and if you follow my blog, you know I do a lot of home decor projects. But, when all is said and done, I find myself giving a lot of store-bought gifts during the holidays, especially bottles of wine. So I have to content myself with adding little handmade elements to things, and that's what inspired today's project: handmade tags!


Handmade tags are one of the easiest ways to add a handmade feel to any gift and you get a whole lot of bang for you buck. For this set, I used Kraft cardstock, Close To My Heart's White Pine complements pack, Glacier extra thick twine, stamps and ink. Let's take a closer look.


I cut 8 tags to 2 1/4 x 3 3/4 inches and used my scallop corner rounder to to give them a decorative edge. For the two tags above, I inked around the edges with my sponge dauber using White Daisy Exclusive ink and added a variety of stickers and kraft pieces from the complements pack. The "Be Merry" greeting is a combination of stamps from the Miracle of Christmas and Say It All (Hostess Reward) stamp sets. "Be" is masked off from "Believe" and stamped in Fern ink and "Merry" is masked off from "Merry Christmas" and stamped in New England Ivy ink.  The "merry" sentiment on the ornament is masked off from the Doubly Merry stamp and is stamped in Cranberry ink.


For the above tags, I randomly stamped the snowflake from Miracle of Christmas and inked around the edges of the tags with White Daisy ink. I also added Diamond Stickles to these and the other tags for a little extra sparkle. Finally, I used a Pentel Silver Signo pen to draw the string on the ornaments.


For these tags, I stamped some more snowflakes in and added thick plastic and kraft White Pines complements. The little animals on the second tag are stickers from the complements. They would normally have a Glacier blue border around them, but I trimmed it off. You can see the border on the tree below.


Finally, for the last two tags, I used a mixture of elements from the complements. I popped the sentiments up with foam tape. Since they are on clear plastic, I strategically placed Blue Enamel Dots and some kraft complements to hide the foam tape. 

And there you have it. A quick and easy way to add a handmade element to any holiday gift. Now hop on over and see what the super-creative Cathy Arbuckle has for your inspiration at These Eager Hands. And here's a list of participants as promised:

Kim {that's me}

Have a wonderfully creative day!


21 December 2013

Kraft-y Hearts Blog Share: Gift-spirations Day 3


Hi All! Welcome to the last day of the Kraft-y Hearts' Gift-spiration Blog Share. Wow! It just occurred to me that this is the last Kraft-y Hearts Blog Share for 2013! Has this year flown by, or what??

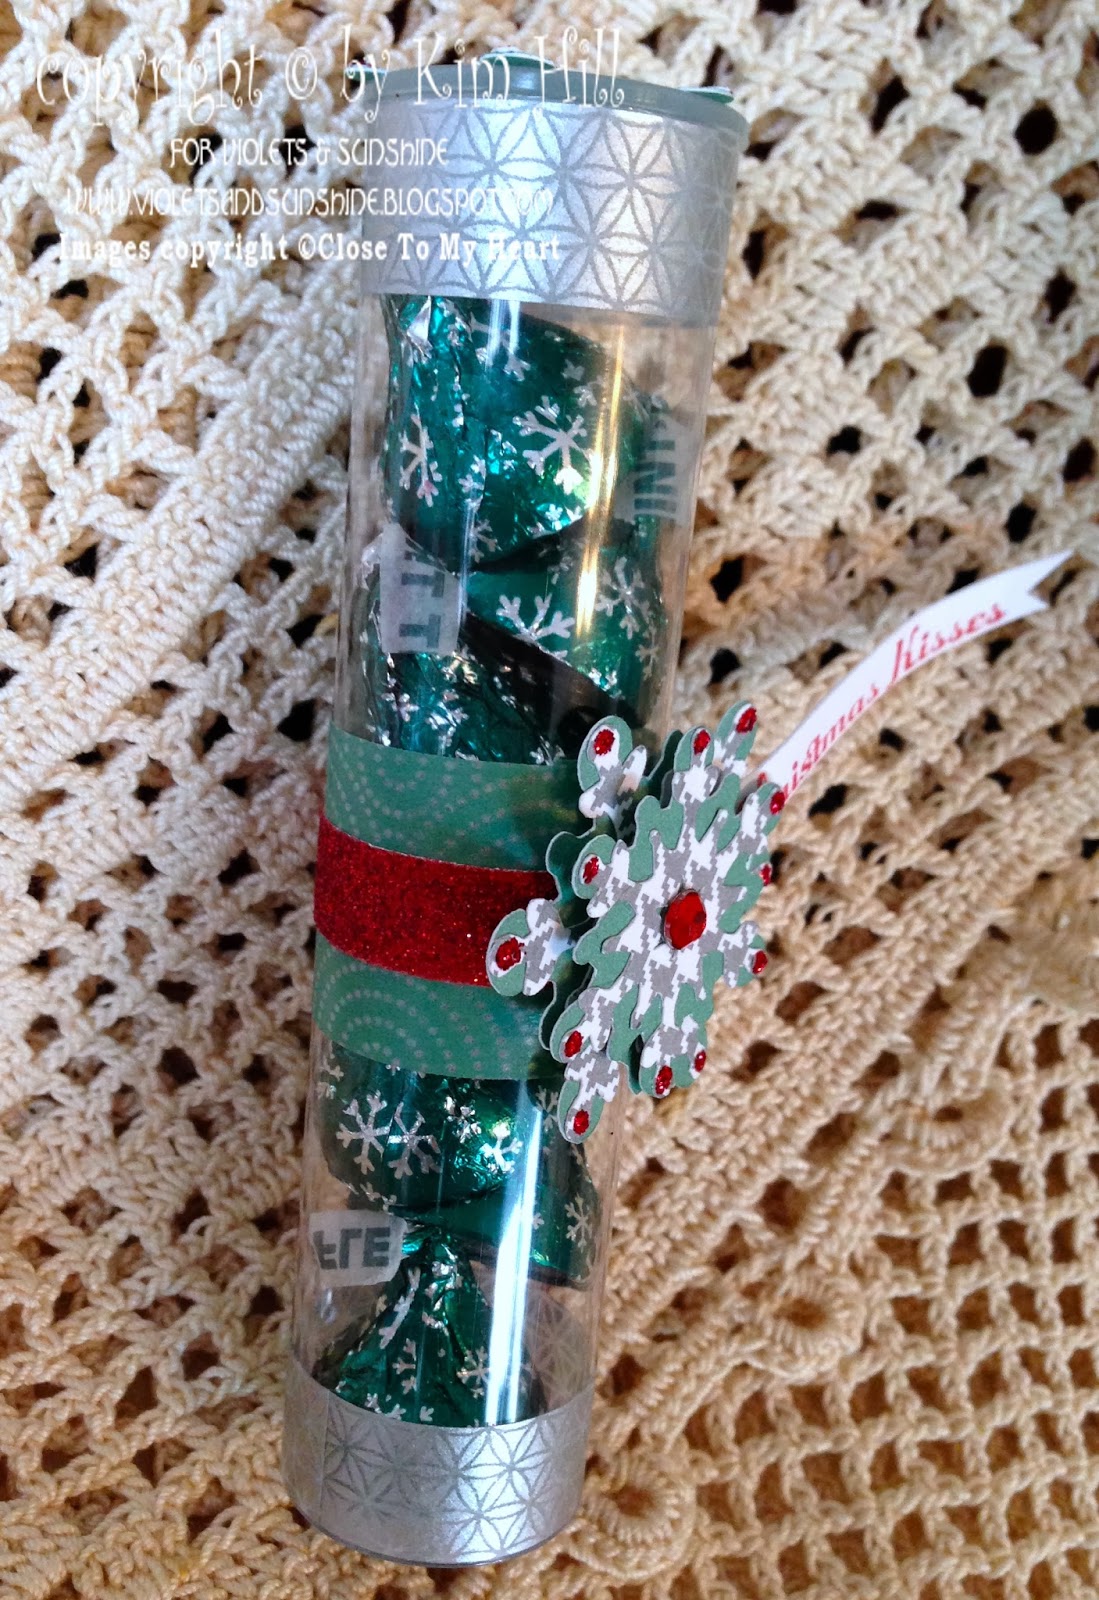
So today's project is another easy, lots-of-bang-for-the-buck project that makes a great stocking stuffer or little gift that brings an extra something to the old gift card standby. Anyone up for some Christmas Kisses?


This project is made from treat tubes, washi tape, and a wee bit of paper. Inside are 7 mint truffle Hershey Kisses. (Yep, this could be a seasonal cheap candy fave for the Hill House….) Let's take a look at the project:


I started by wrapping the treat tubes with silver- and juniper-colored washi tape from Close To My Heart's Sparkle & Shine Washi Tape 3-pack. I then used a little Red Shimmer Trim to layer over the juniper tape. I then cut snowflakes at 1 1/4 and 1 1/2 inches from Juniper Cardstock and Sparkle & Shine pattern paper using the CTMH Art Philosophy Cricut cartridge, and then layered the snowflakes together. I popped up the smaller snowflake in the middle of the larger one with dimensional adhesive. I added Christmas Red Stickles and a red sparkle to the center for bling. The "Christmas Kisses" sentiment is from the Season's Tweetings stamp set. I stamped it in Cranberry Exclusive ink on White Daisy Cardstock and fussy cut it into a little Hershey Kiss-like banner. 


For the top of the treat tube, I cut a 1-inch circle from Sparkle & Shine paper and layered it with another 1 1/4-inch snowflake. I added 7 kisses, and voila, a fun little treat ready to be given away.


Here's another look at the treats.  (Not quite visions of sugar plums, I suppose, but I'd prefer chocolate mints to said plums any day!)


I hope you've enjoyed our gift-spirations. Be sure to stop by and be inspired by all the crafty goodness that Lynn Darda has for you at From My Bungalow.

Have a happy, peaceful holiday season!


20 December 2013

Kraft-y Hearts Blog Share: Gift-spirations Day 2


Good Yule, Folks! Welcome to Day 2 of the Kraft-y Hearts Gift-Spiration Blog Share!

So today's project is more about the wrapping than the gift inside. These little bags are perfect for everything from cookies to a gift card to candy, and so much more. (I suppose you could put a lump of coal or two in one, but why wast such cute packaging, right?) ;-) The best part about these adorable bags is that they are part of a no-sew kit by Close To My Heart called Season's Tweeting Gift Bags kit, which is from the Holidays From The Heart Gift Guide


The kit includes 6 gift bags (3 in each style), 9 tags (that's 3 extra tags just in case you mess up), and the cutest stamp set. All you need to provide is the ink and an acrylic block (3-inch works well). Here are some close ups of the tags I made.


The images are great for coloring. I used 4 colors of Sharpie Markers on these tags (3 greens and a red) that coordinated really well with the fabrics of the bags. The banners were cut out in a New York minute using the CTMH Artiste Cricut cartridge. I popped some of the images up using dimensional adhesive for added interest. (Is that owl cute, or what??)


If you use Sharpies or alcohol inks such as CTMH's Exclusive Inks Markers, your coloring will bleed through the back of your tag. To cover up the bleed, I added a circle of White Daisy cardstock cut at roughly 2 3/4 inches and stamped "To" and "From" on it in Cranberry Exclusive ink

Here's a look at all the bags and tags together:


What could be easier for a gift?? The work is all done for you. All that's left is the fun part: stamping the tags and stuffing the bags with goodies. 

For more fun gift ideas, be sure to hop over and see what the amazingly creative Lynn Darda is up to at From My Bungalow. And we'll see you tomorrow for one last quick gift idea for the holidays!


19 December 2013

Kraft-y Hearts Blog Share: Gift-spirations Day 1


Hi Folks! The Kraft-y Hearts decided to share a little early this month in hopes of offering you a few simple, last-minute gift ideas. I don't know about you, but it seems like my gift list keeps growing and growing. We have teachers, coaches, neighbors, friends, family, hostess gifts--and the list goes on. It's always nice to have an arsenal of nice, inexpensive little gifts on hand for those last minute needs.

Today's project is a departure from the norm for me. I decided to forgo paper and work with fabric. (I know, right?!) So my first little gift--perfect for teachers and friends--is a little tissue cover made with Close To My Heart's Sparkle & Shine Textile pack. 


These little holders are much easier than they look. There are some great tutorials on the web. (I used this one, minus the corner tuck.) Even with my relatively novice sewing machine skills, I was able to knock out seven covers in about 2 hours one evening. The Sparkle & Shine Textile pack gives you enough fabric for about 9 tissue covers. I alternated the outer and lining fabrics so that I had 6 different styles.

Here are the finished products:


Not bad for someone who hasn't sewn on a sewing machine more than twice in the last 30 years! If you wanted to conserve fabric to make more, you can cut the lining and outer fabrics to the same size and forgo the little contrasting edge at the opening. (I like that look, though, so I splurged!) 

So there you go. A little last-minute gift that everyone can use! Now for more gift-spiration, make sure you stop over at From My Bungalow to see what lovely ideas the super talented Lynn Darda has for you!

See you tomorrow for another gift-y little share!


18 December 2013

A Christmas Mini (part 3)

Hi All! Welcome to part 3 of the Christmas mini share. We'll finish up looking at the last pages today. If you missed the previous posts, you can find them here, here, and here.

Page six was cut from Frosted pattern paper. "merry" is cut out of the page, but since it's pattern paper, I wanted to reinforce it a bit. We'll take a look at that when we look at the back of the page. For the photo mats, I added piece of Frosted pattern paper and then used a photo mat from Artbooking as an overlay. I didn't glue the whole thing down so that I could slide 2x2-inch photos in later. The little tag is from the Frosted Stickease assortment. I inked around the edges of everything with Saddle Exclusive ink and added strips of tan glitter paper for sparkle. I also added a little star sticker and blue sparkle to highlight "merry."


Here are some close-ups"


The back of the page is designed to display a 5x7-inch photo. I used a strip of Frosted paper as both contrast on the back page and reinforcement for the "merry on the front. For interest, I used the scalloped border punch on the patterned paper and then inked everything with Saddle Exclusive ink. For the embellishment, I combined a sticker from the Frosted Stickease assortment, a snowflake punched from tan glitter paper and sections of a Frosted zip strip.  The photo mat was cut from Kraft cardstock.


The seventh page was cut from Frosted Grey cardstock (exclusive to the Frosted Paper pack). I cut the page down a bit to make sure that "christmas" was protected by the album covers. I've left this page without embellishment because I haven't decided if it's going to house pictures or Christmas cards. We'll see. But I do love the "word-on-the-edge" pages!


The eighth page is cut from Kraft cardstock. (I used the holly and berries cut-outs on an earlier page.) The holly can really stand on its own as an embellishment, so I just added a zip strip for interest.


Here's a close-up of the holly cut:


For the back of the page, I added a large piece of Frosted patterned paper, which also anchors the holly on the front. (Love the double duty this paper does!) For embellishment, I added strips of tan glitter paper and a strip of Frosted pattern paper, along with snowflakes punched from tan glitter paper. I also inked around the edges of the paper and page with Saddle Exclusive ink.


Here's a close-up of the embellishment:


Finally, let's take a look at the inside back cover. If you've been following this blog, then you know that I love pockets. There's no way I could make a Christmas mini and not add a pocket! This pocket is a mini page from the baby album in Artbooking cut from Frosted paper. I folded it a little differently to make it into a coin-style envelope. I inked around the edges in Saddle Exclusive ink and adhered it to the back cover with very strong adhesive.


Here's a look at it opened:


And there you have it! My 2013 Christmas Mini Album. I hoped you enjoyed it! Be sure to tune in the rest of the week for the upcoming Kraft-y Hearts Blog Share. I'll be featuring some not-to-be-missed simple, last-minute gift/stocking stuffer ideas.


17 December 2013

A Christmas Mini (part 2)


Hi All! Welcome back to day two of my Christmas Mini pages. If you missed the cover and/or the first couple of pages you can find them here and here. Now on with the show….


The third page is an under cut page with sporting a cut-out "25." I used Kraft cardstock for the page and inked the edges with Saddle Exclusive Ink. I used stickers from the Frosted Stickease assortment and tan glitter paper to decorate the page and to give it more dimension.

Here's a close-up:


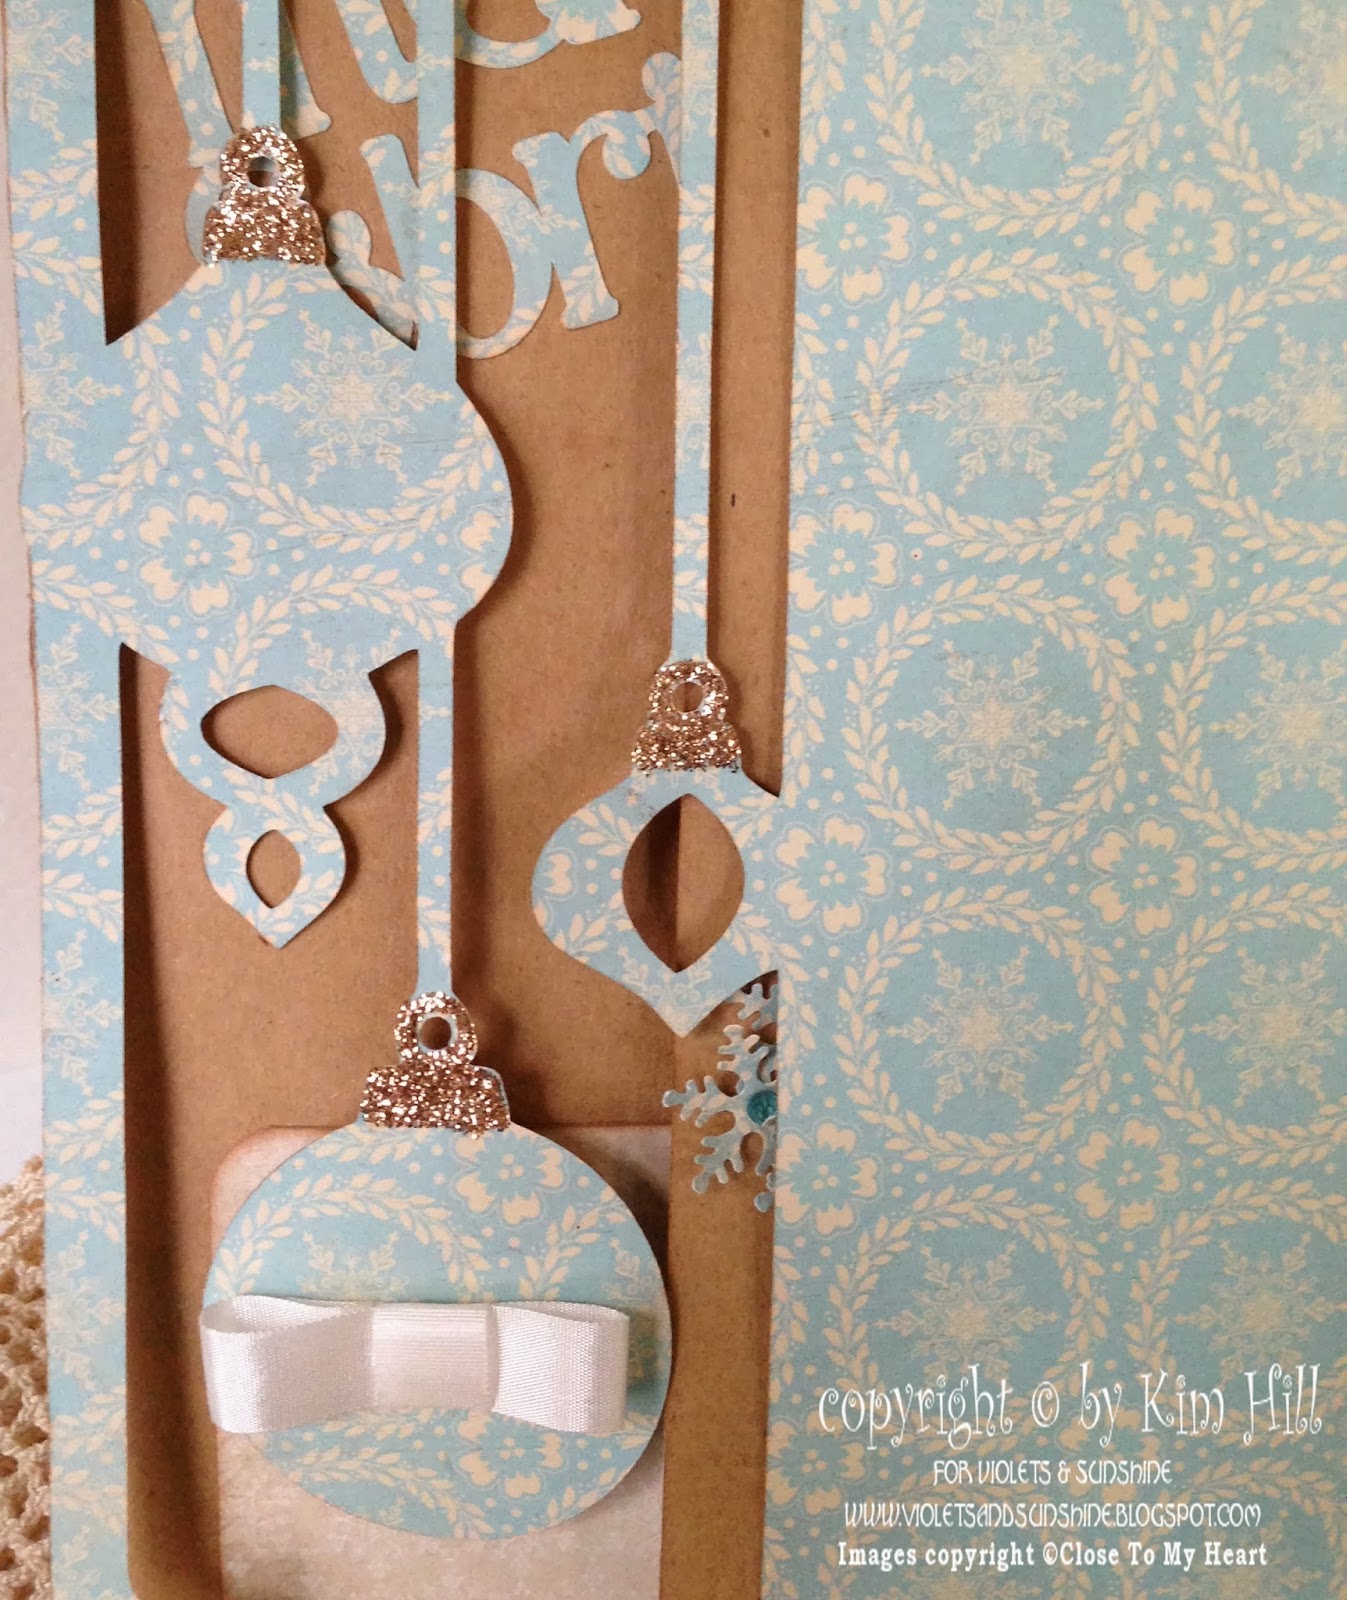
The ornament is cut from tan glitter paper using the Artbooking cartridge. I couldn't resist adding a little light blue sparkle to the smallest snowflake. (Is there such a thing as too much bling? I think not!)

To get the most from this page, I decided to add photo mats to the back that could showcase 3x3 photos. The beauty of double-sided paper is that the top photo mat also provides a beautiful background to the "25" on the front. I also used my snowflake punch, Frosted paper, blue sparkles, and Frosted Stickease to add just a little something extra to the page without taking up too much room.


Here's a couple of close-ups of the embellishments:


The fourth page is one of my favorite cuts. I decided not to layer it over a base page (which is how it's presented in the Artbooking handbook) so that you could see the page behind it. Also, because the pattern in the paper is rather busy (though beautiful), I didn't think it needed much embellishing. To that end, I added a little Almond Glitz Glitter Gel to the ornaments, along with a sticker and sparkle and some Color Ready Seam Binding Ribbon. I also inked around the edges of the page and the ornaments with Saddle Exclusive Ink to make them pop against the background of the next page.


Here are some close-ups of the ornaments:


Here is the back side of the page. I think this is my favorite pattern in all the Frosted papers (though it's very hard to choose). Again, I kept the embellishing to a minimum in order to let the paper speak for itself.

Okay, so one last page before we go today. The fifth page is a standard base page cut from Frosted Turquoise paper (exclusive to the Frosted paper pack).  To embellish this page, I added a holly spring and berries that were left over from cutting another page (which I will show you tomorrow). The holly is cut from Kraft cardstock to which I added Almond Glitz Glitter Gel for sparkle. I layered that on top of a strip of Frosted pattern paper for an elegant and simple bit of embellishment.


Here is a close-up of the holly:


The back of the page is embellished with ornaments and "Believe" all cut from Artbooking. "Believe" was cut from both Colonial White cardstock and Frosted paper. I layered them to help the word pop off the page. The base of the ornaments are cut from Frosted paper and their embellishments are from tan glitter paper. The top ornament is embellished with the "negative" of the embellishment cut and a blue sparkle.


Here are a couple of close-ups:


I hope you are enjoying a tour of the Christmas mini. We'll finish looking at the last of the pages tomorrow. Until then, have a wonderful day!